by Camila Feb 06,2025
Conquering Baramos's Lair in Dragon Quest 3 Remake: A Comprehensive Guide
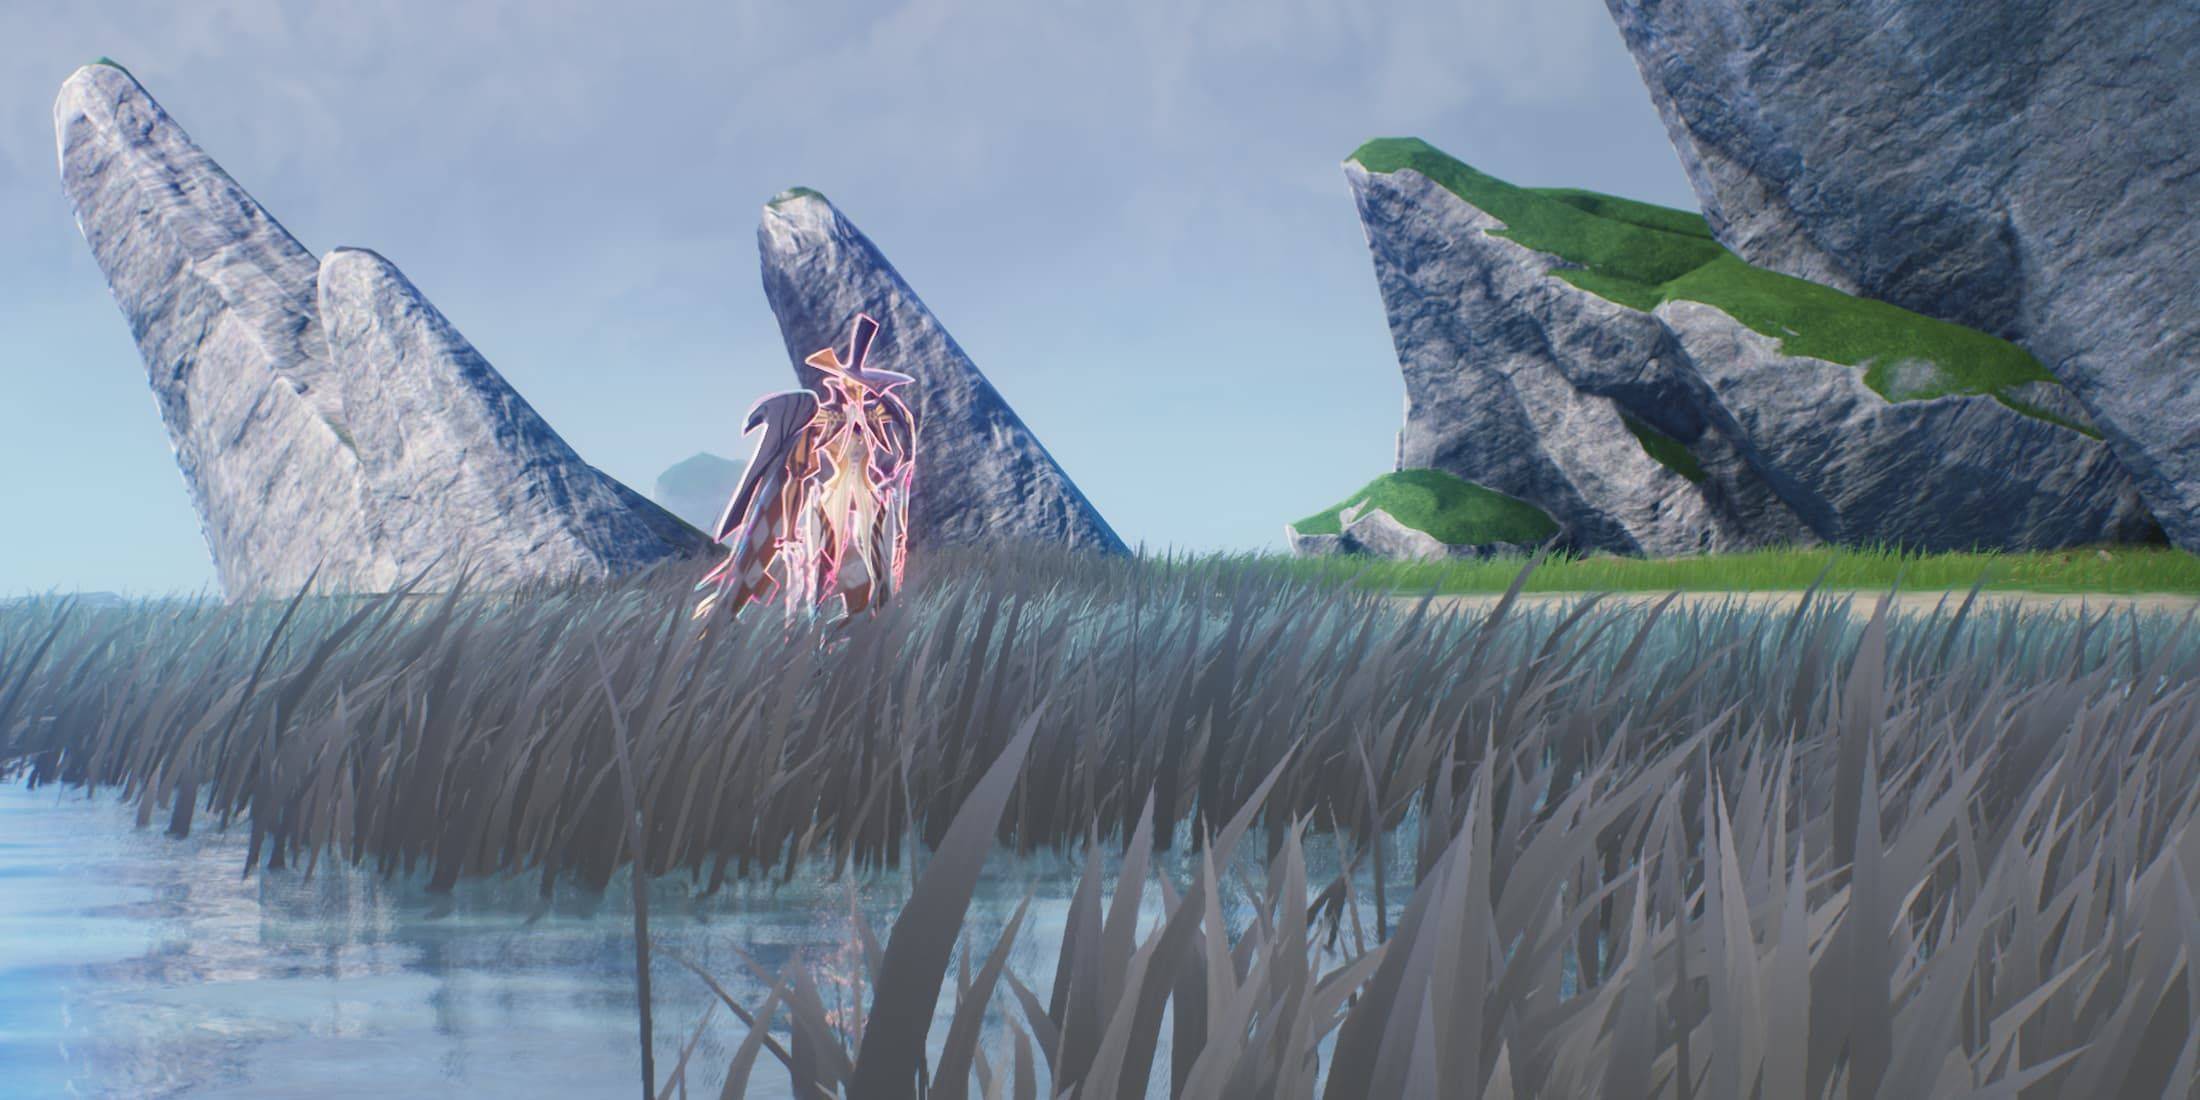
After securing the Six Orbs and hatching Ramia the Everbird, your journey culminates in Baramos's Lair. This challenging dungeon serves as a significant test before venturing into the underworld. This guide details navigating and conquering Baramos's Lair in Dragon Quest III HD-2D Remake.
Baramos, the primary antagonist of the game's first half, resides within this formidable dungeon. Access is granted only after obtaining Ramia, who transports you to the lair's valley. Aim for a party level of at least 20 before attempting this challenge. The lair holds valuable treasures, detailed below.
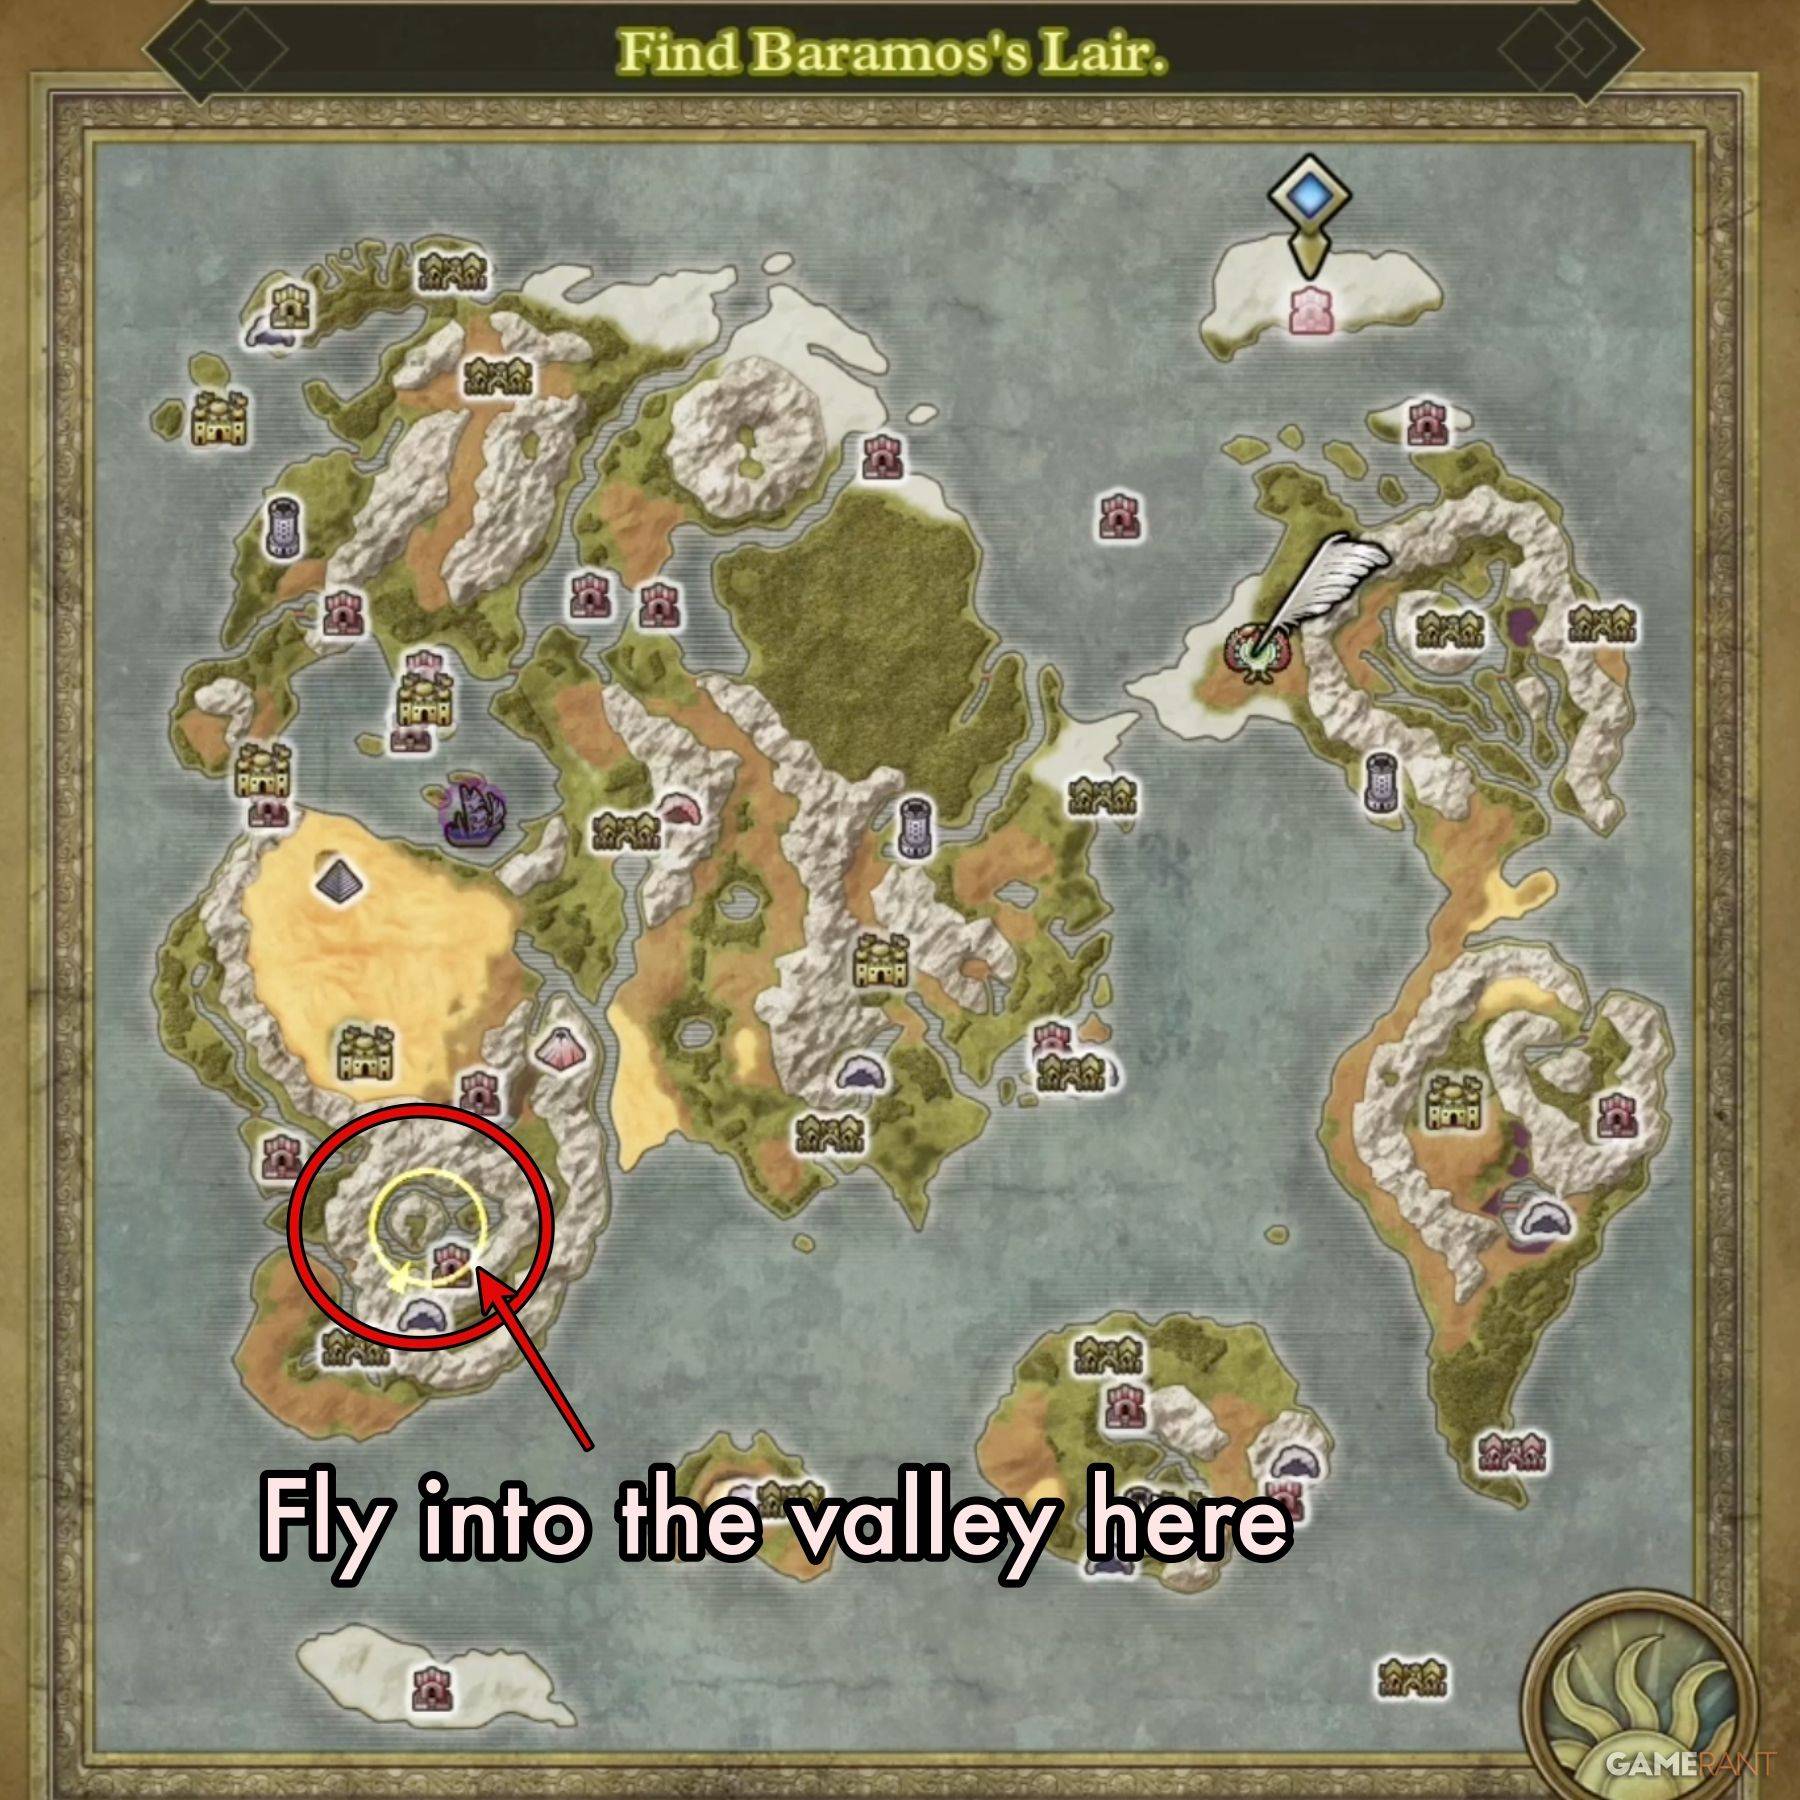
Following the Maw of the Necrogond and acquiring the Silver Orb unlocks Ramia. Fly from either the Shrine of the Everbird or Necrogond Shrine to a mountainous island—Baramos's Lair's location. Ramia will deposit you near the entrance.
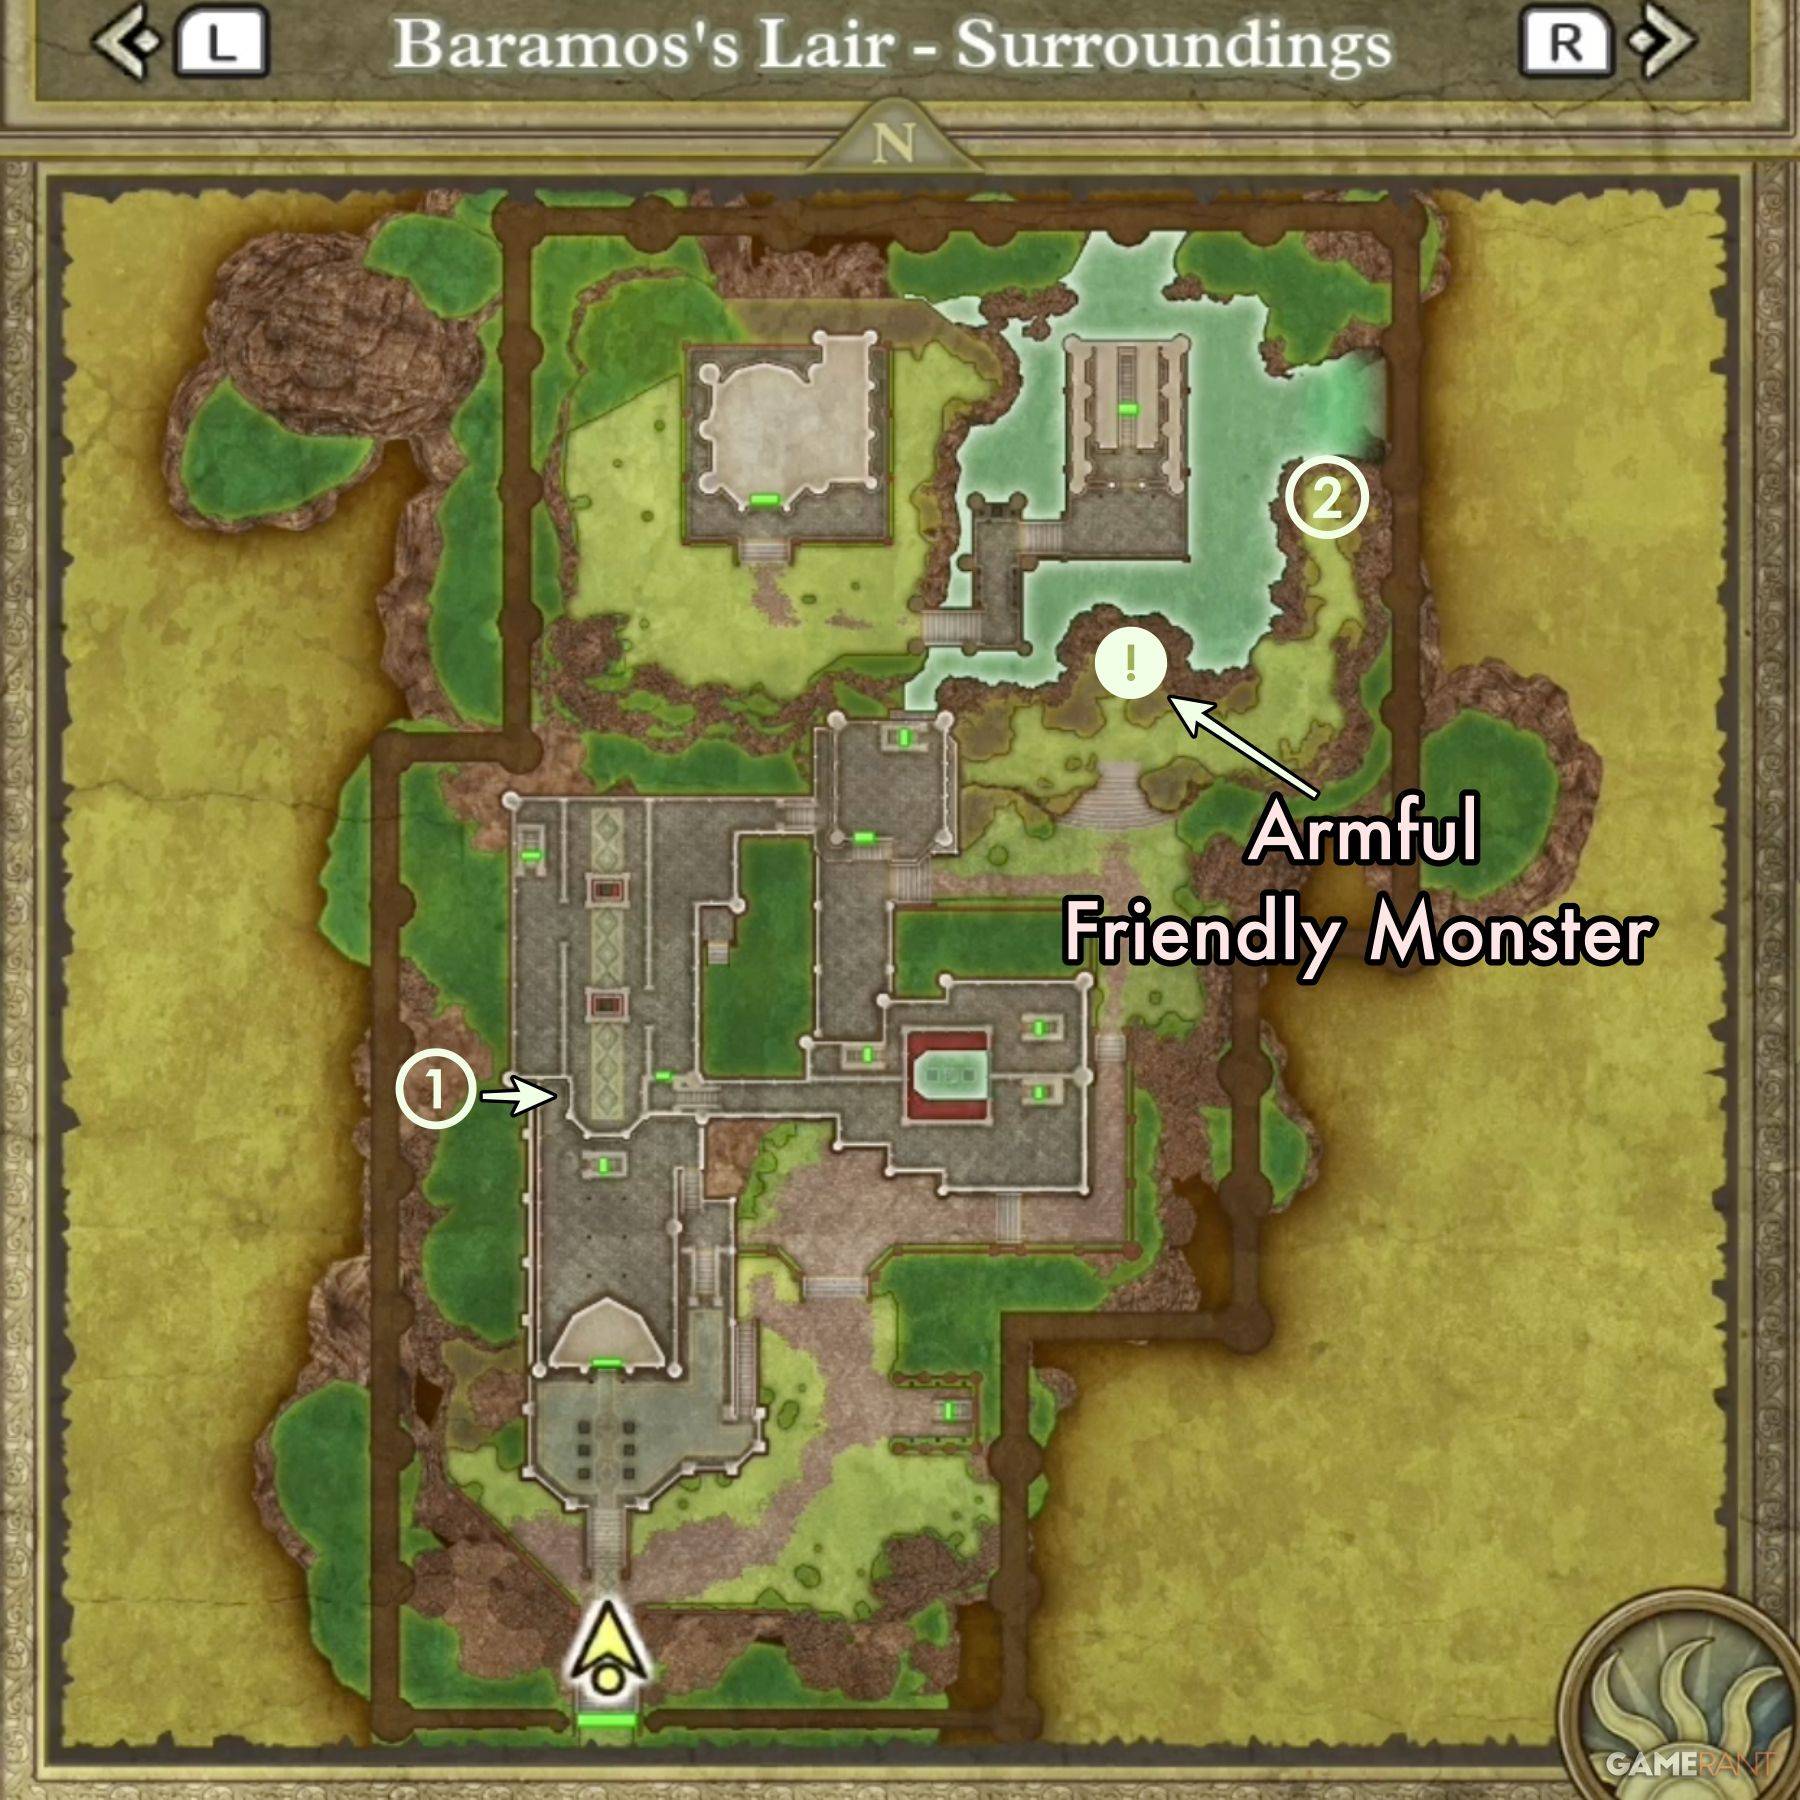
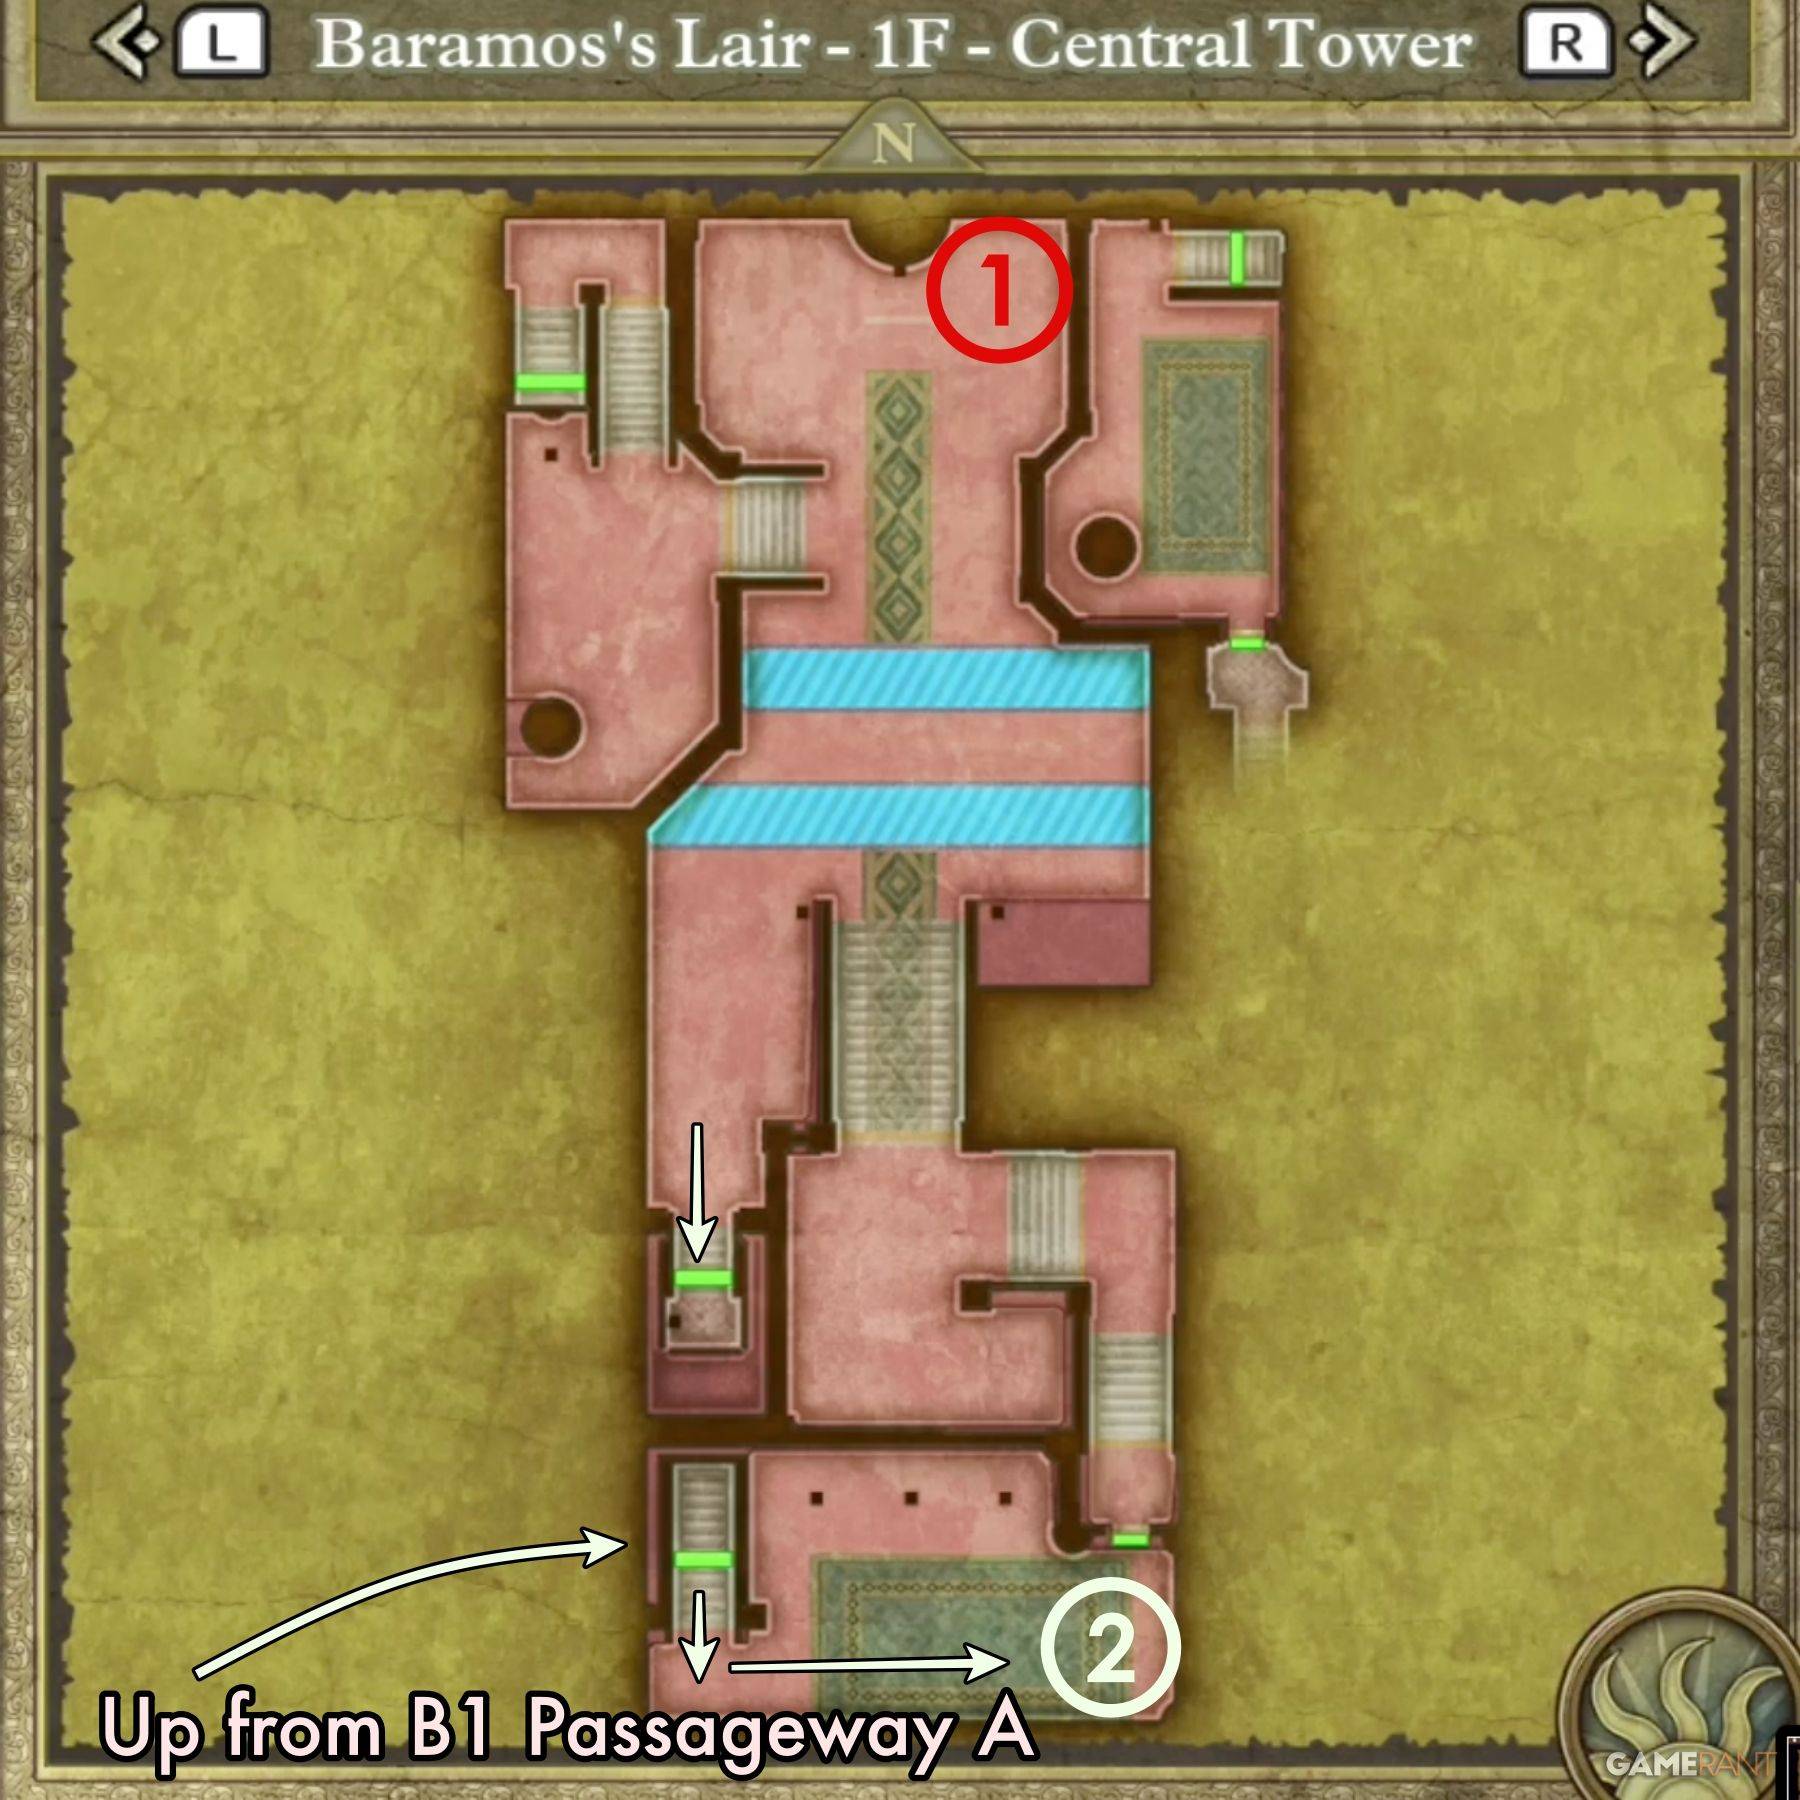
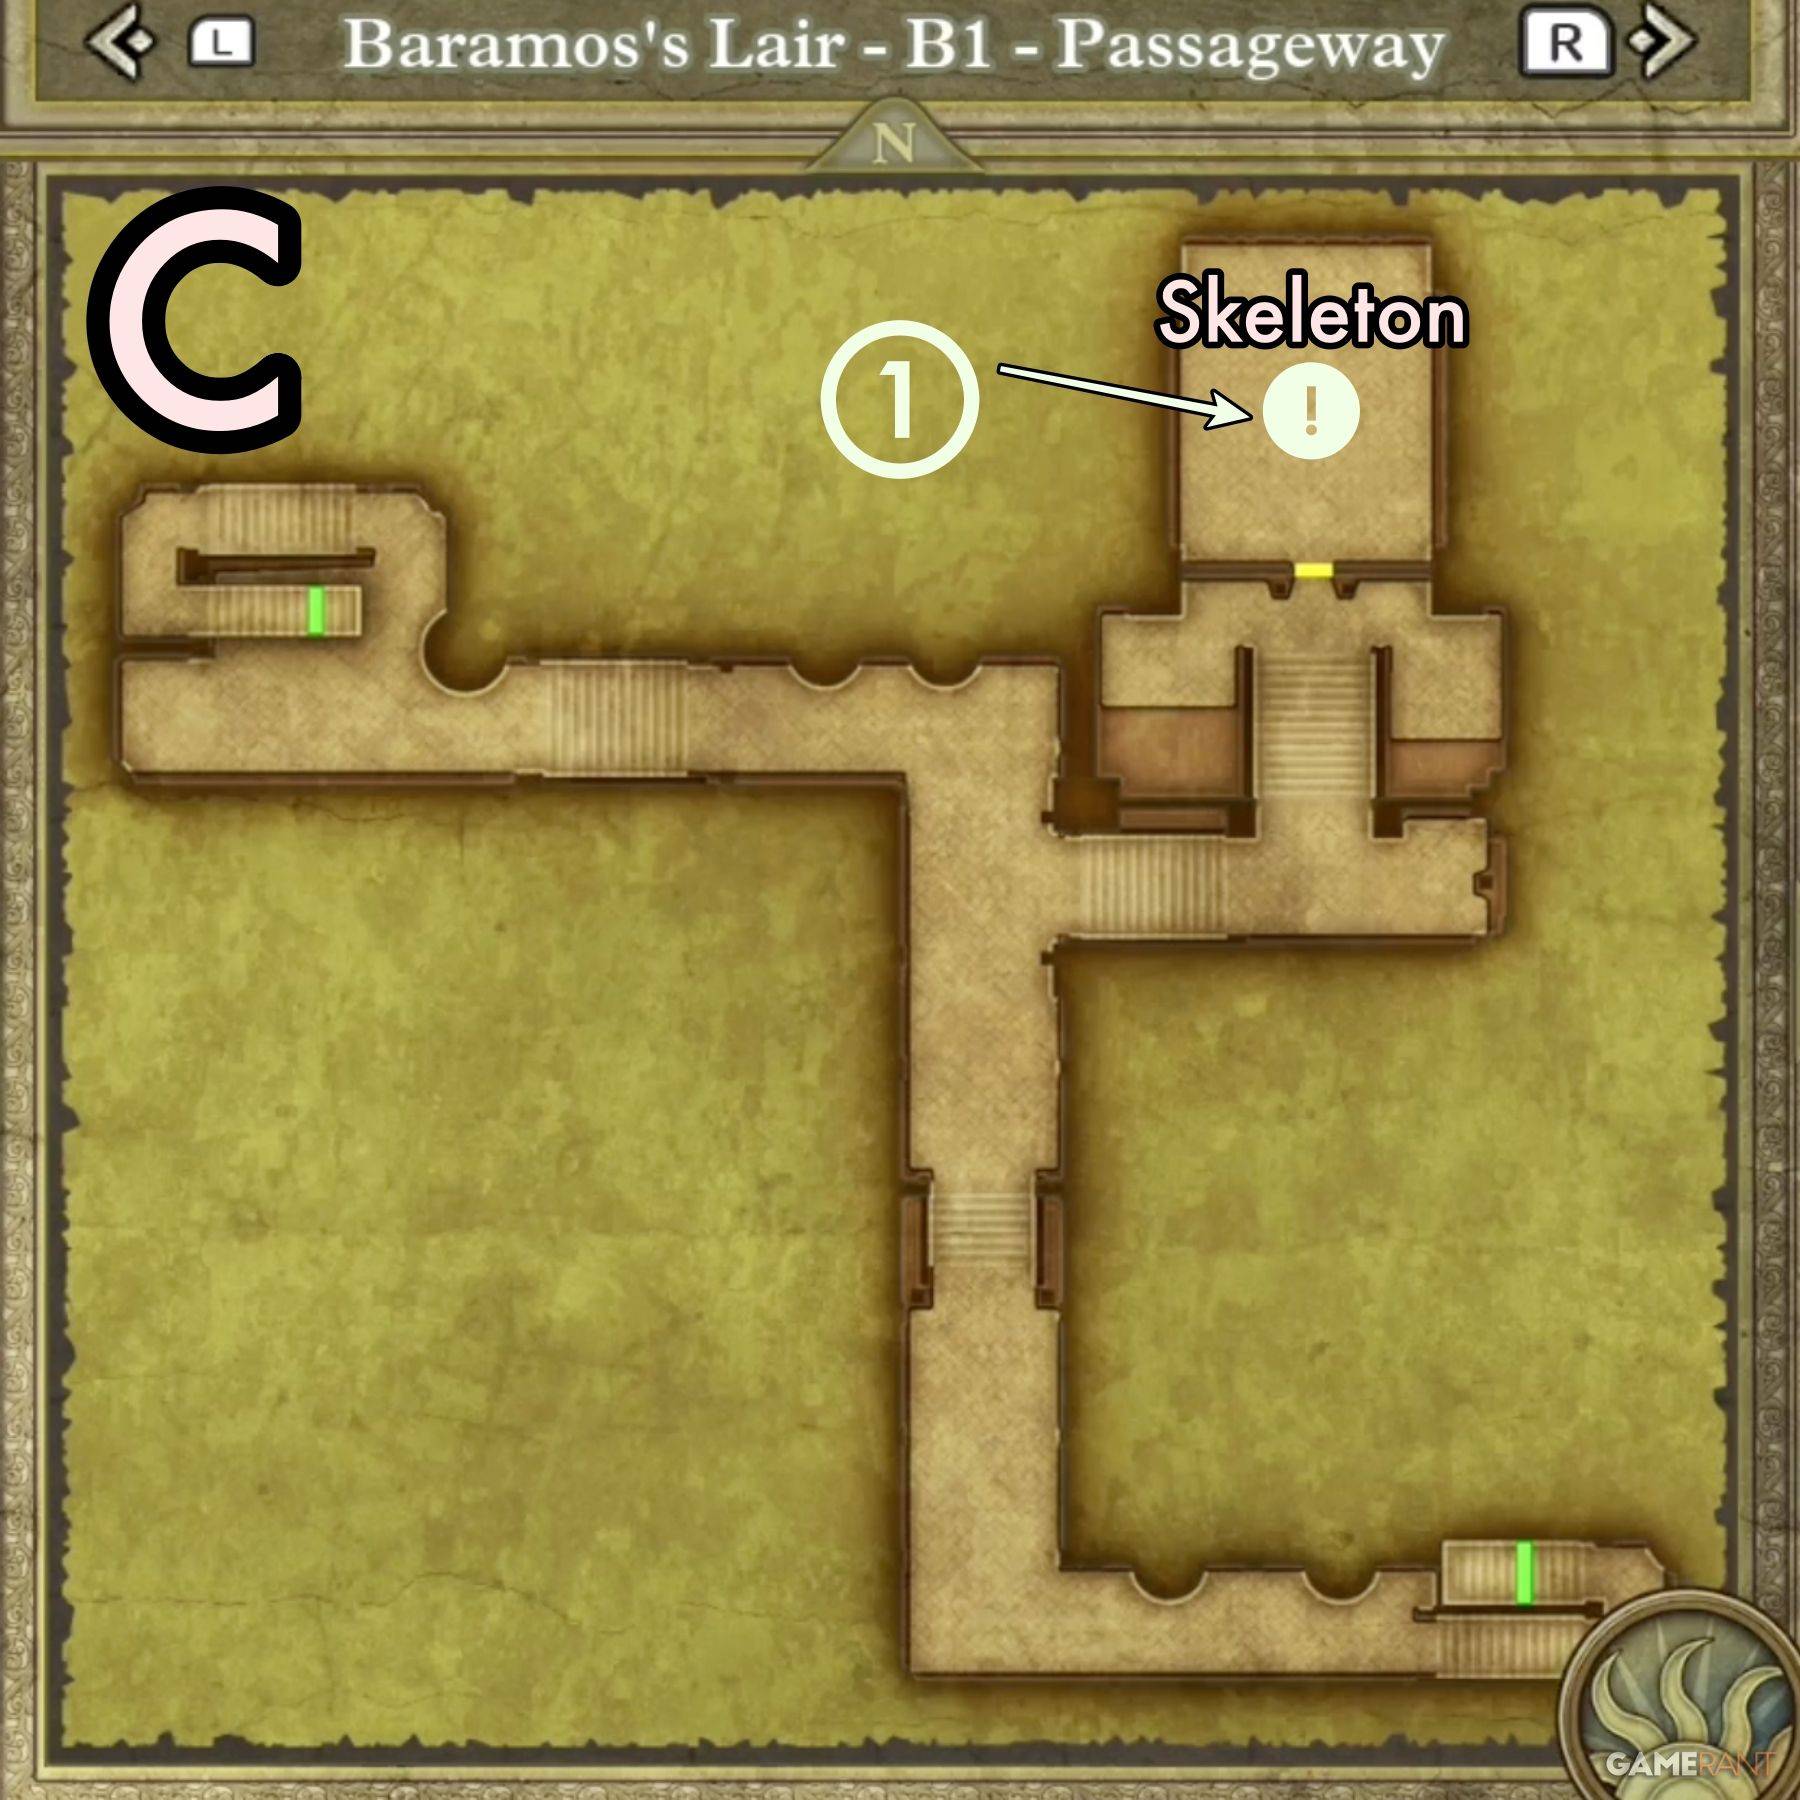
Unlike typical dungeons, Baramos's Lair involves traversing indoor and outdoor areas. The goal: reach Baramos. The main outdoor area, "Surroundings," serves as a central hub. We'll outline the main path to the boss, followed by treasure locations on each floor.
Main Path to Baramos:
Surroundings:
Central Tower:
South-East Tower:

B1 Passageway:
Throne Room:

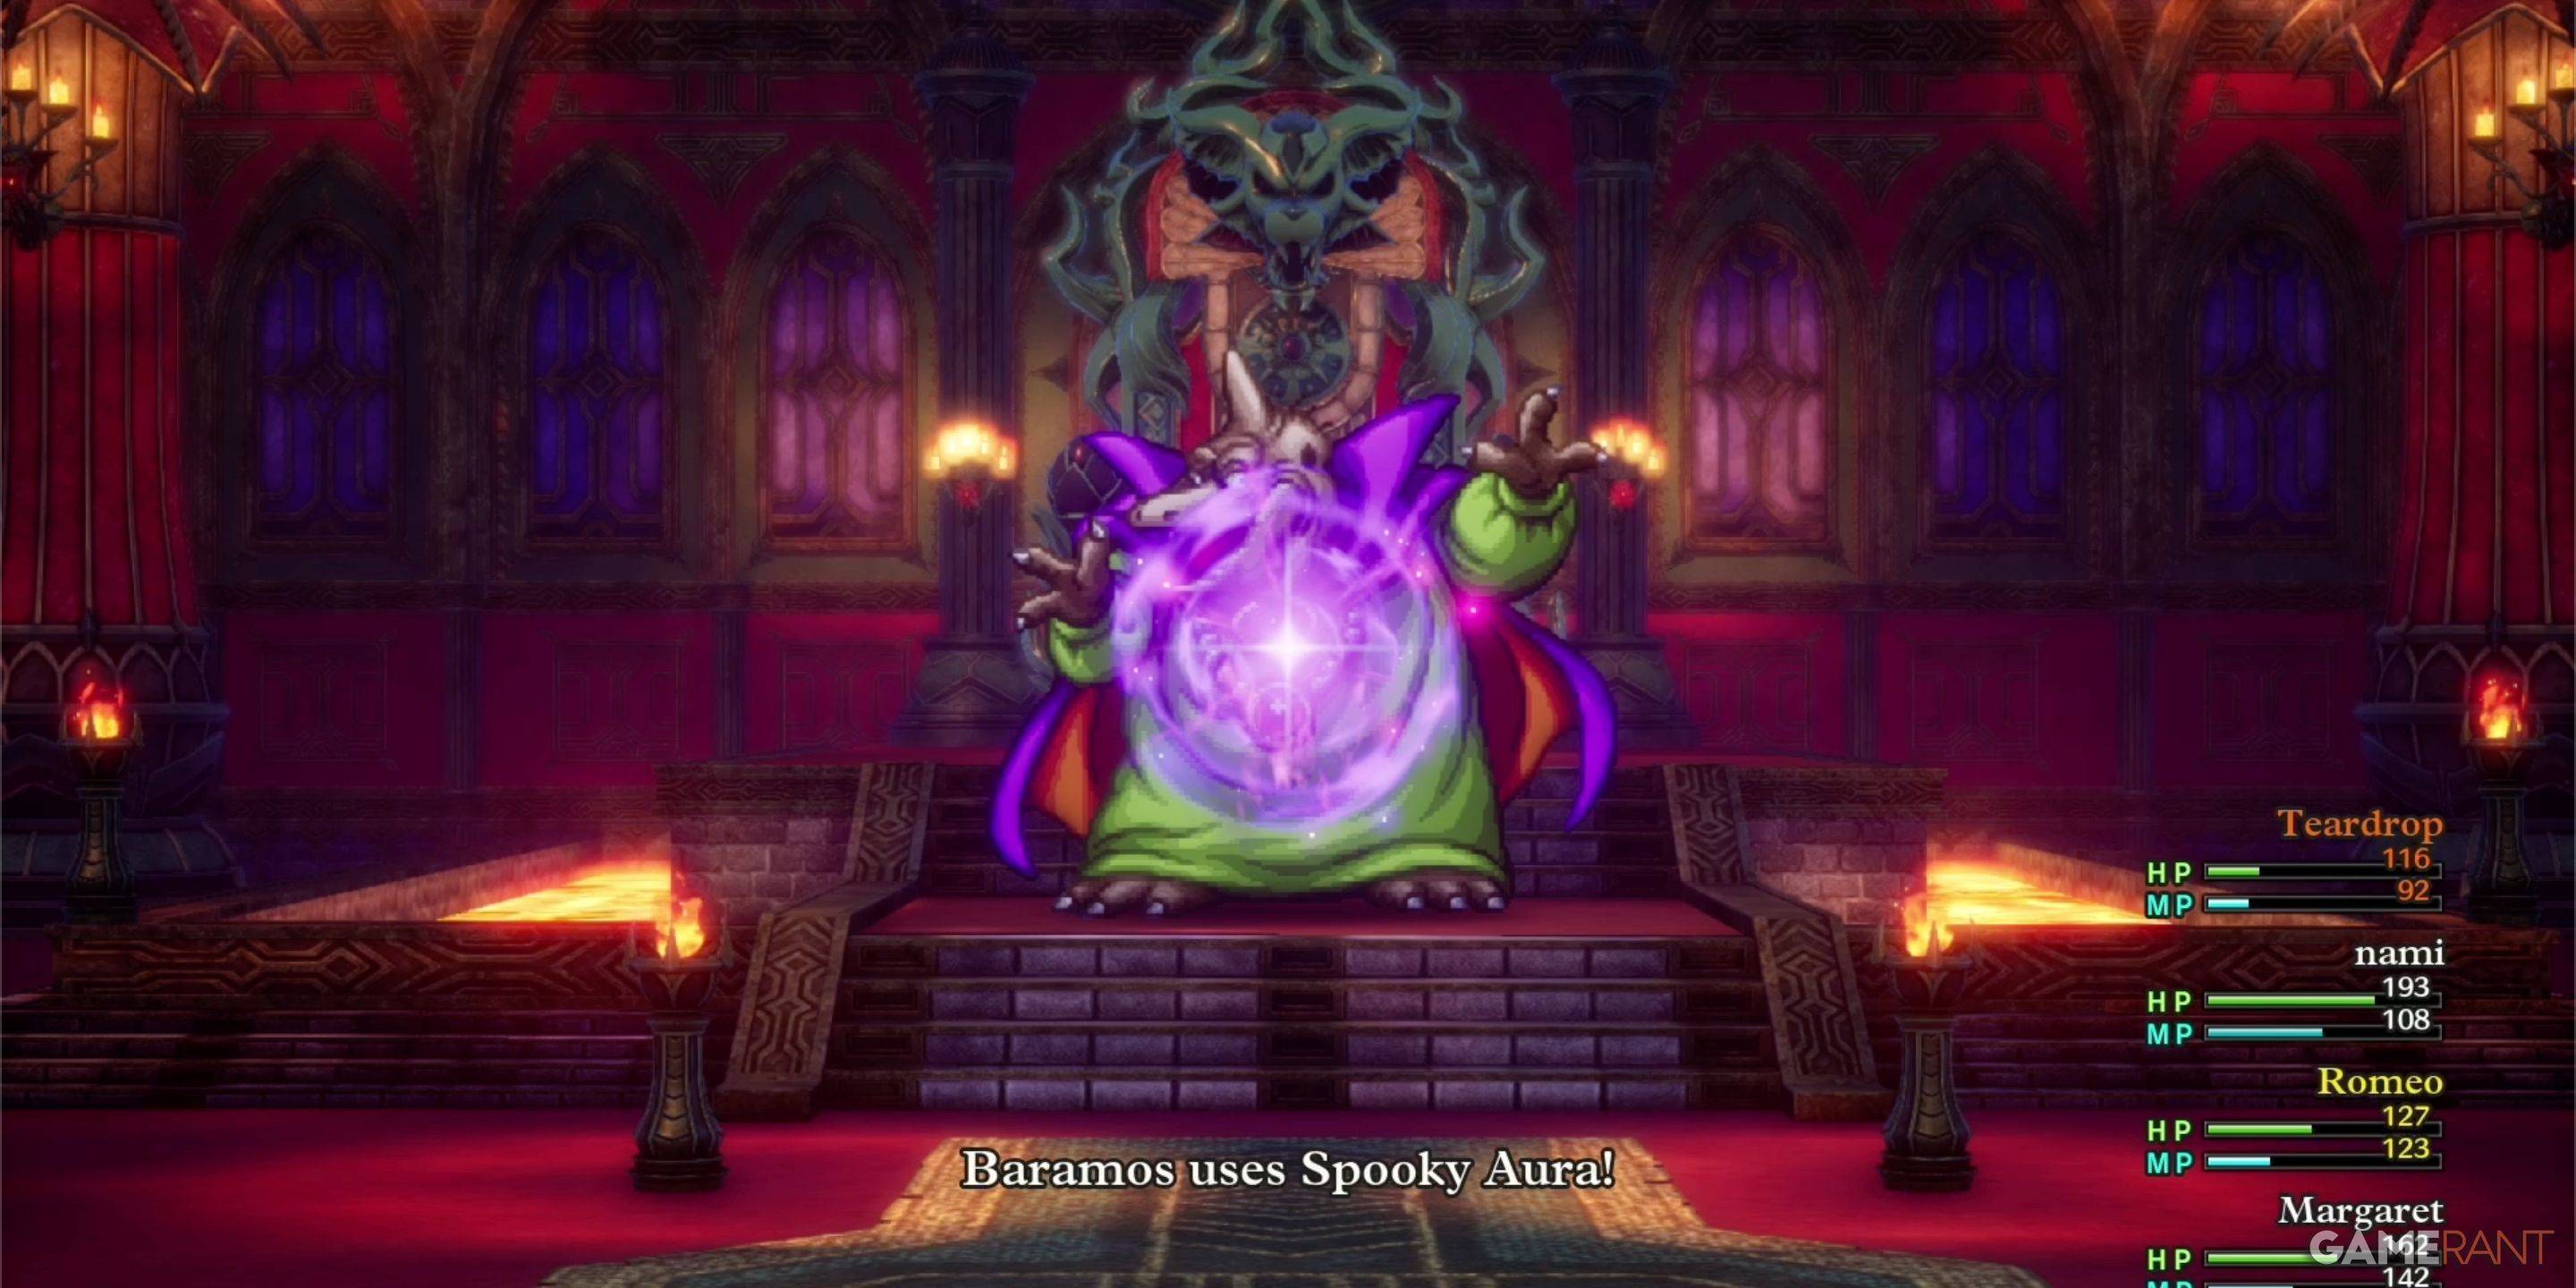
Baramos is a formidable opponent. Strategic planning and proper leveling are crucial.
Baramos's Weaknesses:
Utilize high-level spells like Kacrack and Swoosh (if available). Maintain a dedicated healer. Prioritize survival over speed.

| Monster Name | Weakness |
|---|---|
| Armful | Zap |
| Boreal Serpent | TBD |
| Infanticore | TBD |
| Leger-De-Man | TBD |
| Living Statue | None |
| Liquid Metal Slime | None |
| Silhouette | Varies |
This comprehensive guide equips you to navigate and conquer Baramos's Lair, a pivotal point in your Dragon Quest 3 Remake adventure. Remember to adjust your strategy based on your party's strengths and weaknesses.
How to Start Cars Without Keys in Project Zomboid
Black Clover M: Latest Redemption Codes Revealed!
Awakening of the Ninjas Codes (January 2025)
Roblox Releases New Liar's Table Codes
PUBG Mobile to launch a new collaboration with luggage brand American Tourister, coming next month
Activision Defends Against Uvalde Suit
Tower of God Celebrates First Anniversary with Updates
New Black Clover: Wizard King

Marvel Contest Unleashes New Champs and Quests for New Year!
Feb 07,2025

Roblox Breaks Boundaries with New Car Training Codes
Feb 06,2025
Dream Patrol: A Stormy Rescue in Wuthering Waves
Feb 06,2025
Roblox: Unlock Free Loot with Lootify Codes (Jan '25)
Feb 06,2025
Storm the Isle! Unleash with Stormshot Redeem Codes for January 2025
Feb 06,2025
 Category