by Owen Apr 13,2025
The ROG Ally made a splash in 2023 as a compelling alternative to the Steam Deck, thanks to its Windows operating system that opens up access to a wider range of games. The subsequent release of the ROG Ally X last year not only enhanced the internal components but also improved the ergonomics and cooling, making it even more comfortable to use.
While the ROG Ally excels in portability, it's a bonus to be able to enjoy your games on a larger screen, whether it's on your TV or a gaming monitor. Fortunately, both versions of the ROG Ally support connection to external displays. Below, you'll find a comprehensive guide on how to connect your ROG Ally to a TV or monitor, complete with detailed instructions and recommendations.
Connecting your ROG Ally to a TV or monitor can be achieved in various ways, but using an adapter is a straightforward and space-saving option. You can choose between a small dongle-style adapter, a direct cable, or the official ROG Gaming Charger Dock, all of which are readily available.
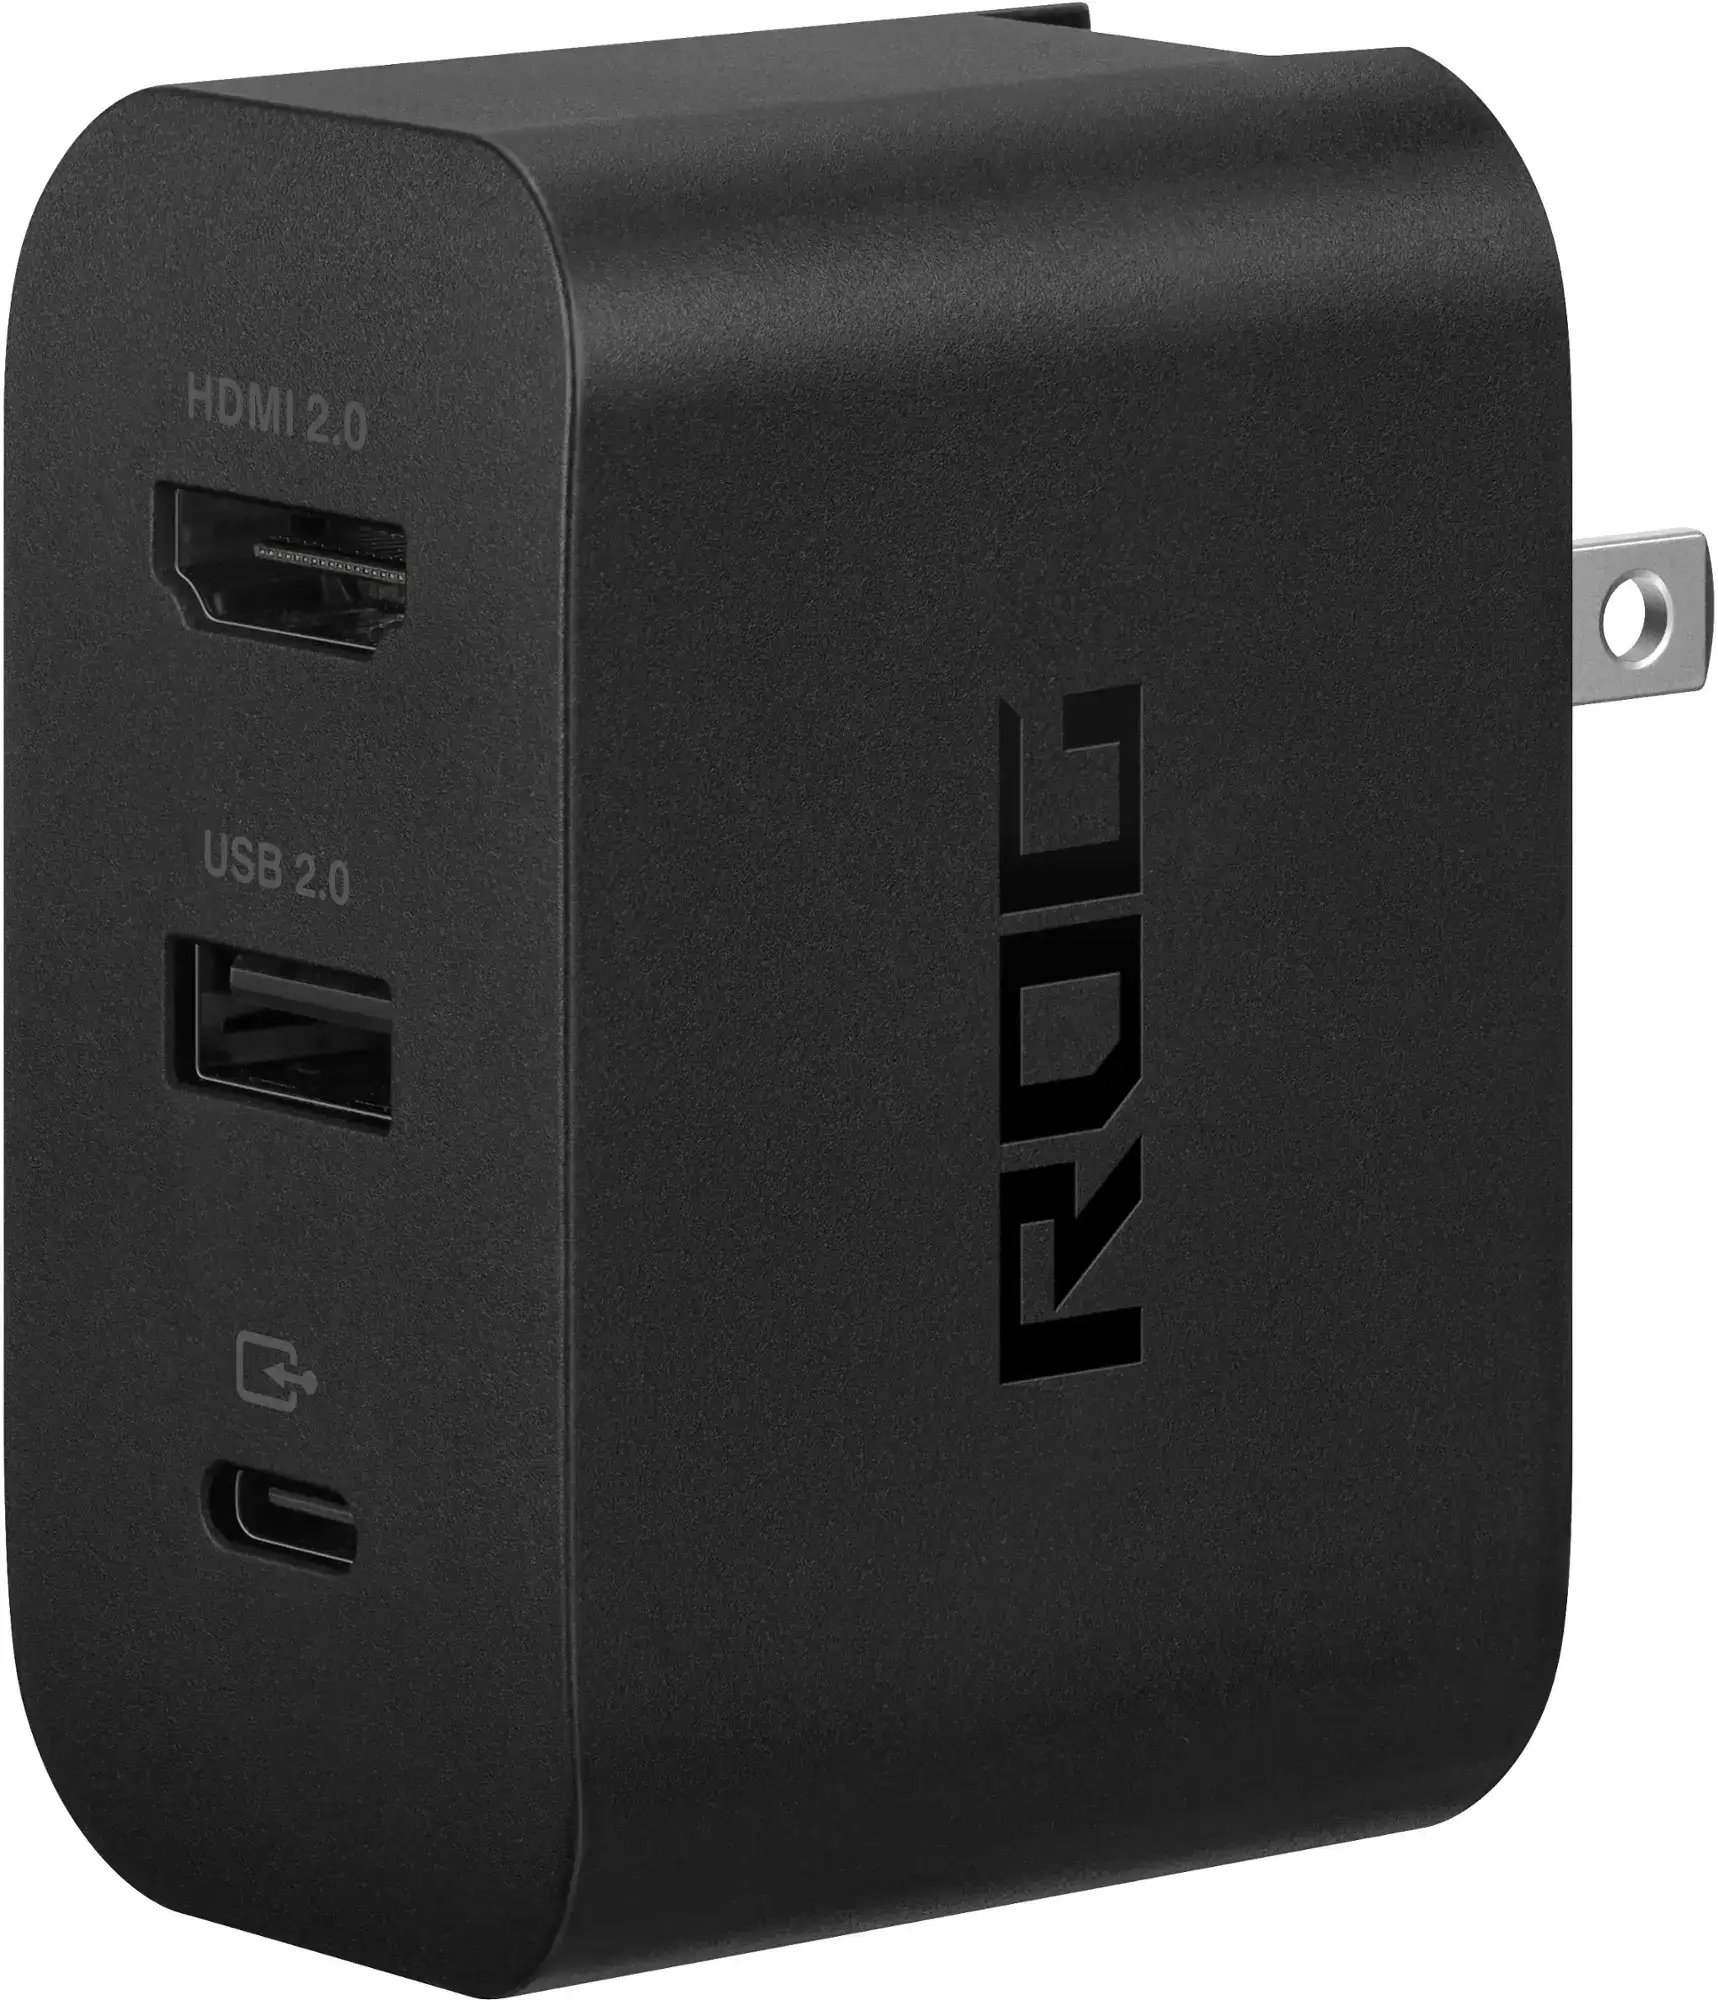
Supports HDMI 2.0 with USB Type-A and USB Type-C for ROG Ally. See it at Best Buy
Asus has streamlined the process of connecting the ROG Ally to a TV with the official ROG Gaming Charger Dock, which is the most compact adapter option. It serves a dual purpose as a charger, requiring only a USB-C and HDMI cable. The Charger Dock also includes a USB-A port for connecting peripherals like a mouse or keyboard.
For those preferring a third-party solution, a USB-C to HDMI adapter can be directly plugged into the ROG Ally's USB-C port. Then, attach an HDMI cable from the adapter to your TV or monitor. Alternatively, a USB-C to HDMI cable offers a seamless, one-cable solution directly from your ROG Ally to your display.
It's important to mention that some USB-C to HDMI adapters come with a passthrough USB-C port, allowing you to charge your ROG Ally while it's connected to an external display. If your adapter has this feature, you'll need an additional USB-C cable and your power adapter to keep the internal battery charged during gameplay.
For a setup reminiscent of the Nintendo Switch, consider using a docking station. While the ROG Ally doesn't have an official docking station beyond the ROG Gaming Charging Dock (which functions more as an adapter), there are numerous third-party options available. These docking stations enable you to place the ROG Ally into a stand while connecting to your TV or monitor and charging simultaneously.
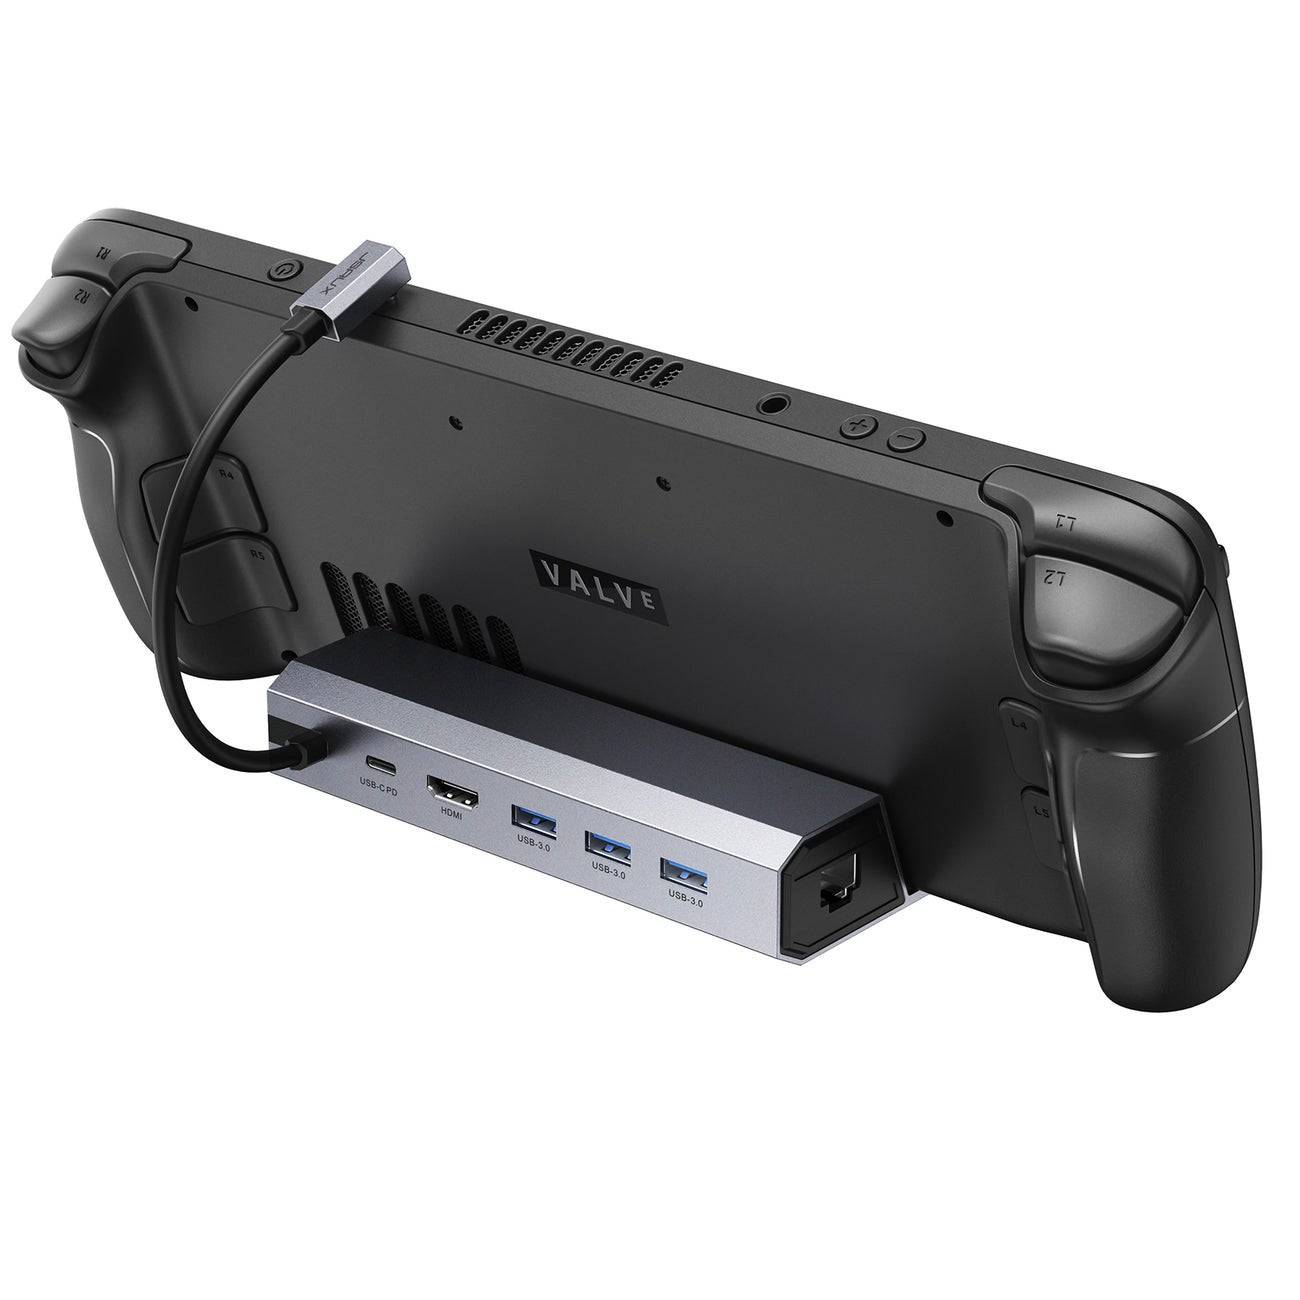
2100 watts of power for fast charging and a plethora of ports come with this lightweight, compact dock that also serves as a stand. See it at Amazon
Basic docks for the ROG Ally typically feature an HDMI port and a USB-C passthrough charging port. For more comprehensive setups, consider docks with additional USB ports for peripherals, external hard drives, Ethernet ports for stable internet connections, SD card slots for expanded memory, and even a Display Port for connecting an additional screen. Portable docks make it convenient to travel with the ROG Ally and connect to larger displays on the go. Many docks compatible with the Steam Deck are also suitable for the ROG Ally.
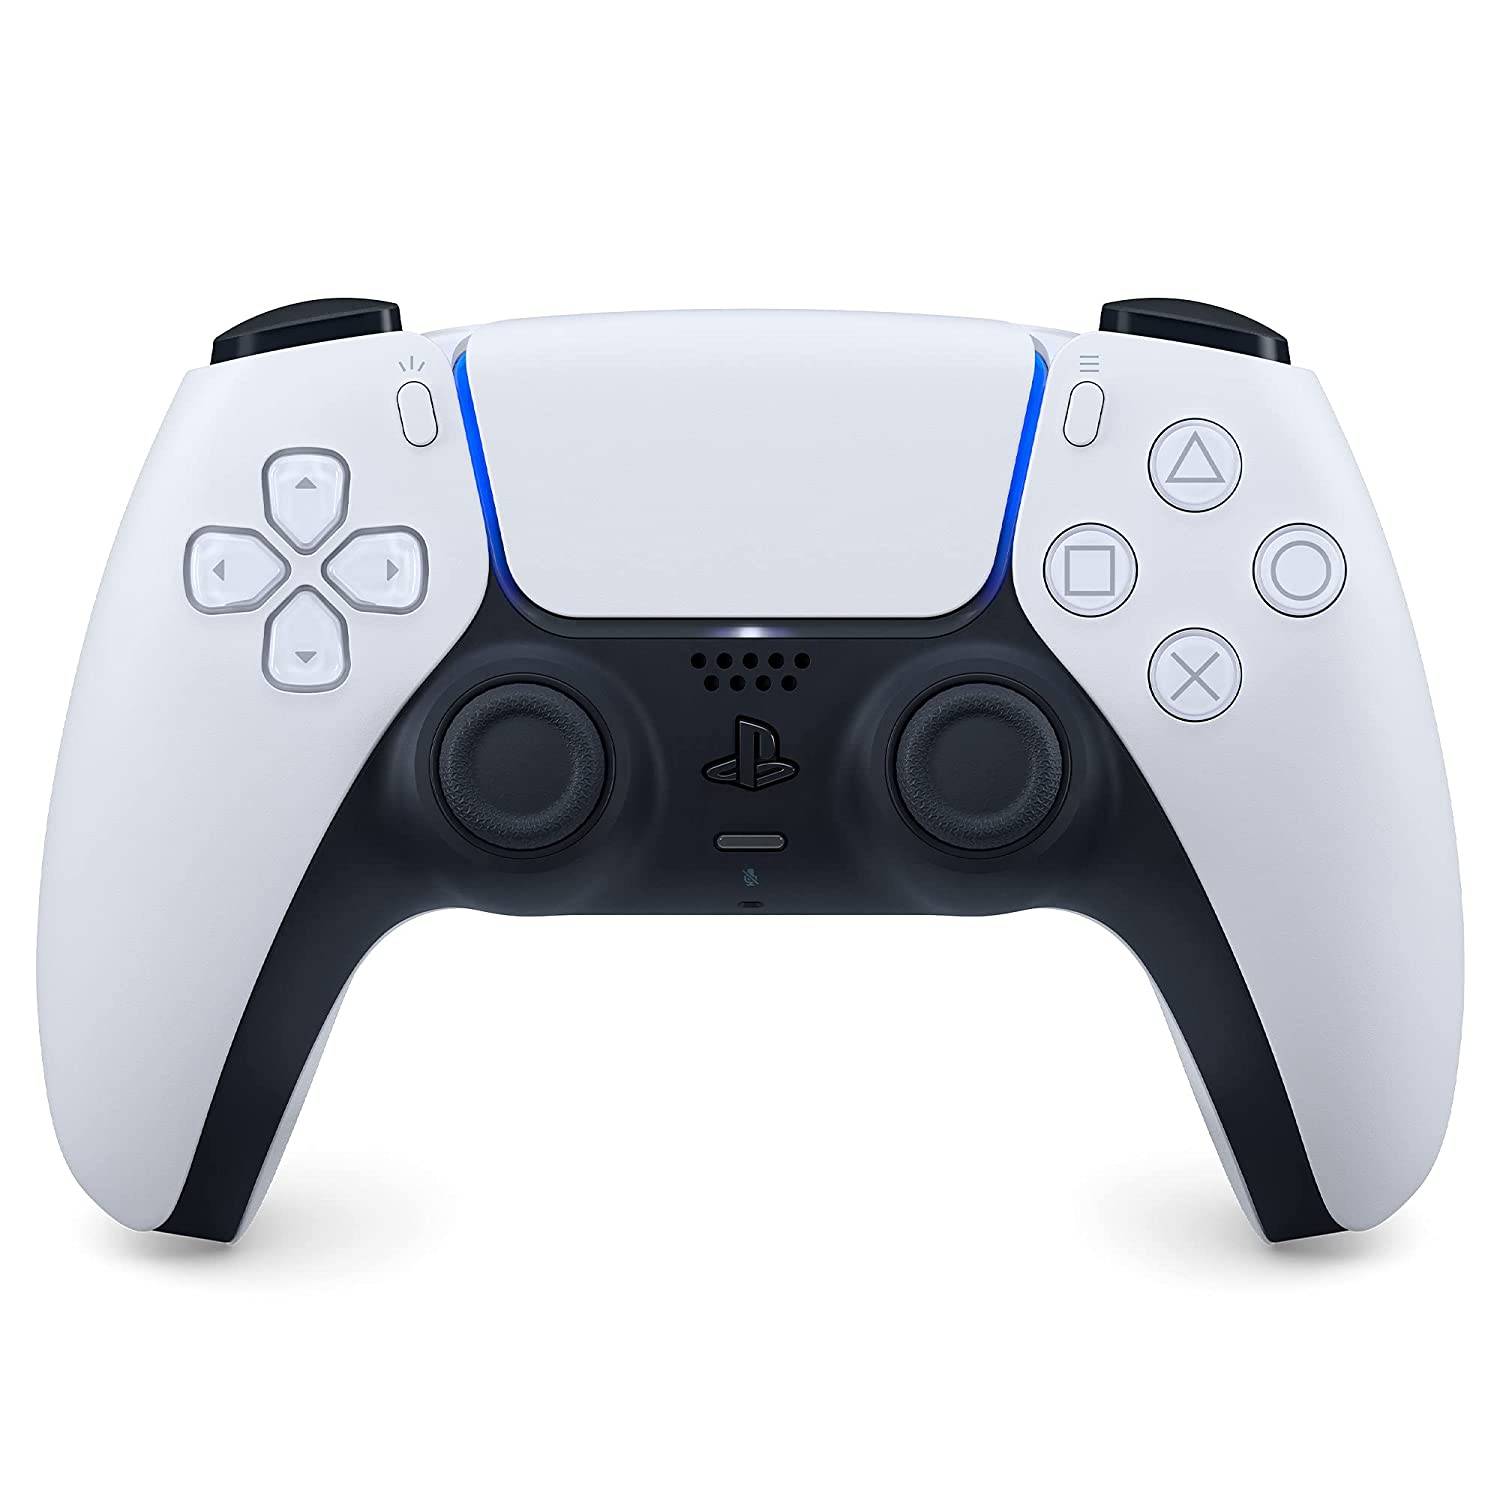
While you can connect a mouse and keyboard to your chosen docking solution, using a wireless controller often provides the most comfortable gaming experience on a larger screen. The ROG Ally supports any Bluetooth-enabled gaming controller. Below are our top picks for the best controllers, which are compatible with both the Steam Deck and the ROG Ally.
See it at Amazon | See it at Best Buy | See it at Target

See it at Amazon | See it at Best Buy
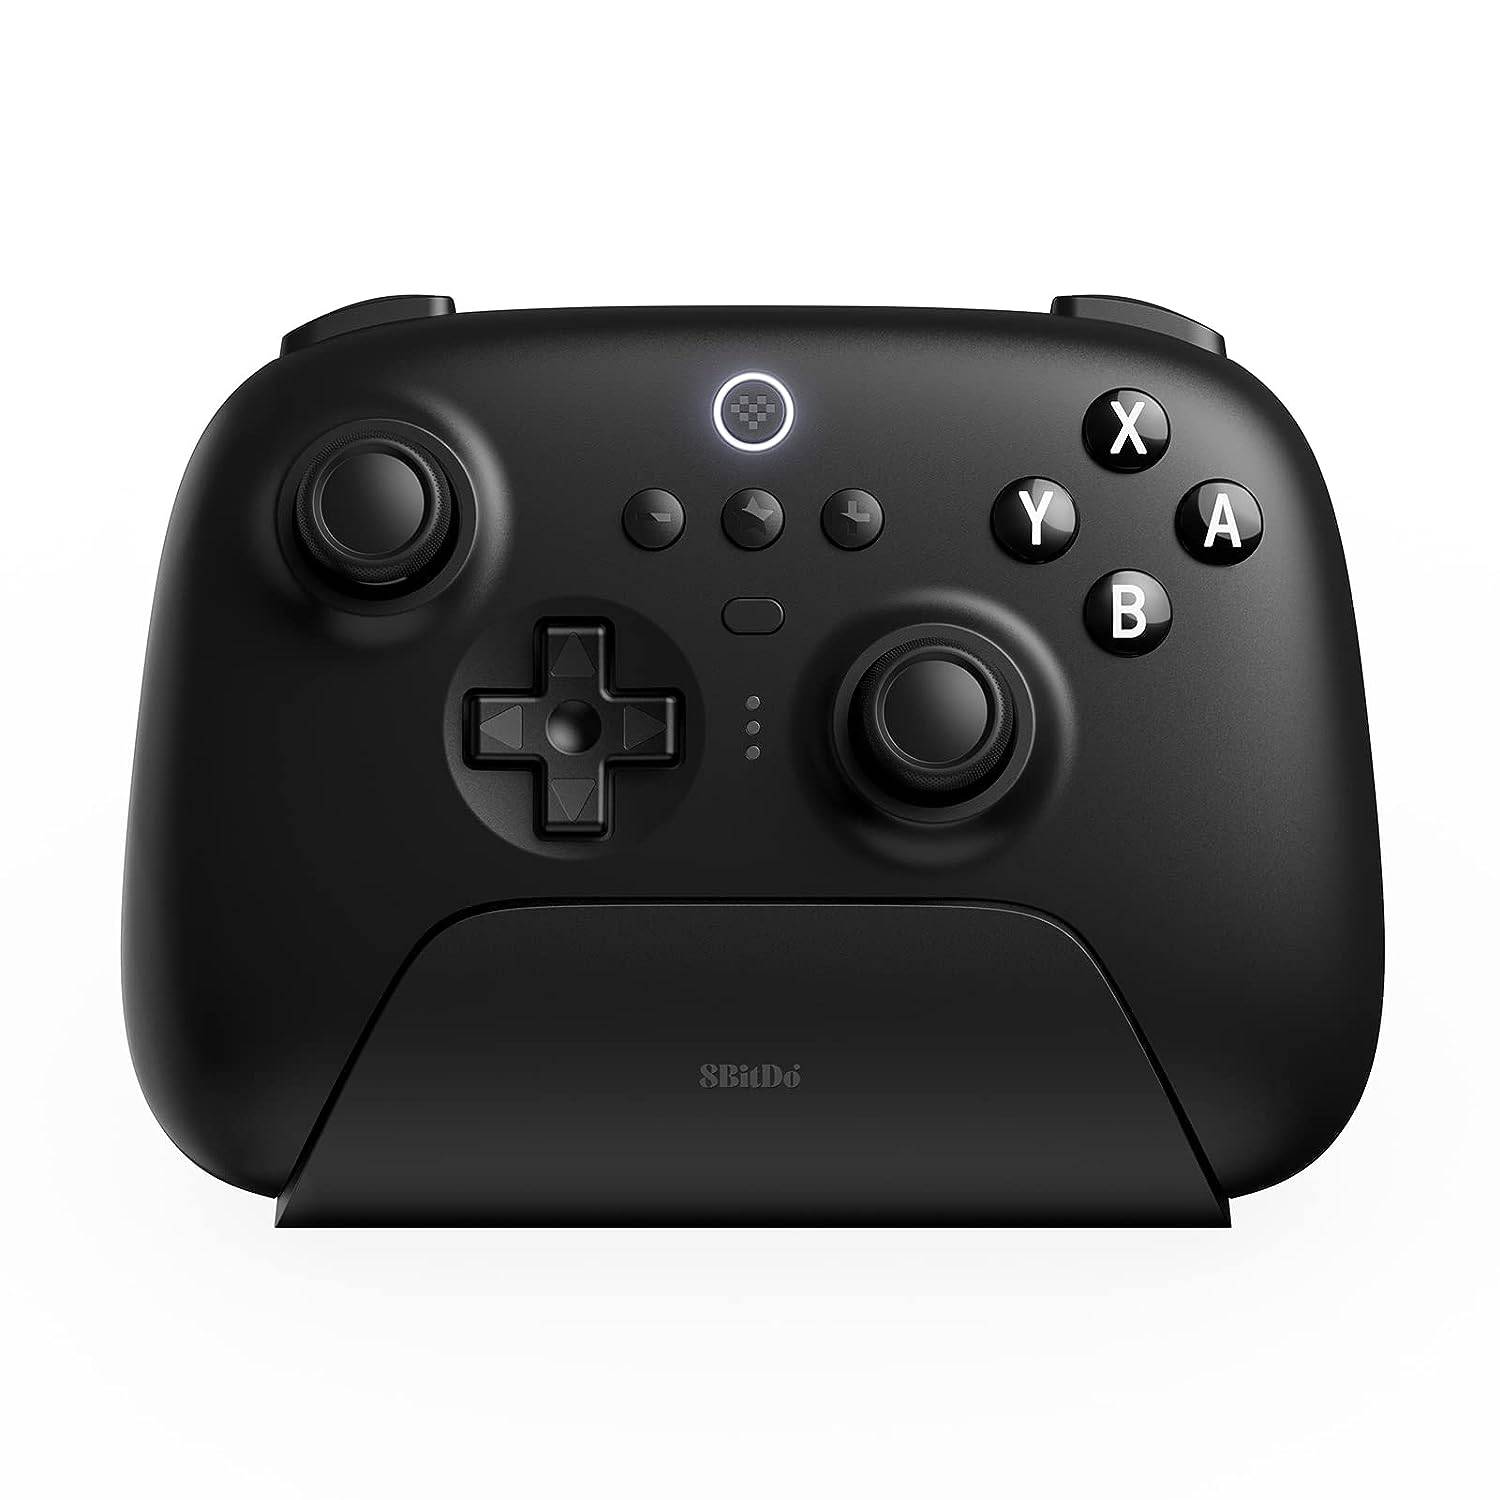


This selection includes first-party options like the PS5's DualSense, the Xbox Wireless Controller, or the Nintendo Switch Pro Controller, as well as a variety of third-party controllers. Some controllers utilize a 2.4GHz wireless connection with an included USB adapter, typically providing lower latency and better range than standard Bluetooth controllers. For those preferring a wired solution, a USB controller offers a simple plug-and-play option when sitting close to your ROG Ally or docking station.
How to Feed Villagers in Necesse
Bitlife: How to Complete the Renaissance Challenge
Bahiti Hero Guide: Mastering the Epic Marksman in Whiteout Survival
Best Bullseye Decks in Marvel Snap
One of the most famous CoD players thinks the series is in the worst state now
How to Complete Canker in Kingdom Come Deliverance 2
Infinity Nikki: How to win at Marble King
How to Start Cars Without Keys in Project Zomboid

Police Transport Ship Car Simulator
Download
Tap Tap Music-Pop Songs
Download
Map One Block Survival - block
Download
MMA Federation - Card Battler
Download
Toddler Sing & Play Christmas
Download
Piano Music Tiles 2
Download
Napolitan Revenge
Download![The Ravages hand travel [three cards]](https://img.uziji.com/uploads/69/173069422567284c51773d5.jpg)
The Ravages hand travel [three cards]
Download
にゃんこ大戦争
Download
How to Get Signal Redirector in Atomfall
Apr 13,2025
Assassin’s Creed Shadows: Playable Without Prior AC Experience
Apr 13,2025

Surprise! Warhammer 40,000: Space Marine 3 is announced
Apr 13,2025

Sniper Elite 4 Now Available on iOS for iPhone and iPad
Apr 13,2025

Sticker Ride: Evade Traps in Sticky Puzzler, Coming Soon
Apr 13,2025
 Category