by Evelyn Apr 16,2025
In Path of Exile 2, The Slithering Dead is an engaging side quest where Servi, the local guide at the Ziggurat Encampment, seeks your assistance to unravel the mysteries surrounding a rival tribe and the fate of her son, Apus. While the quest itself is relatively straightforward once you know the route, the real challenge lies in choosing the right rewards. Servi offers three distinct rewards, but you can only select one, making your choice permanent and irreversible.
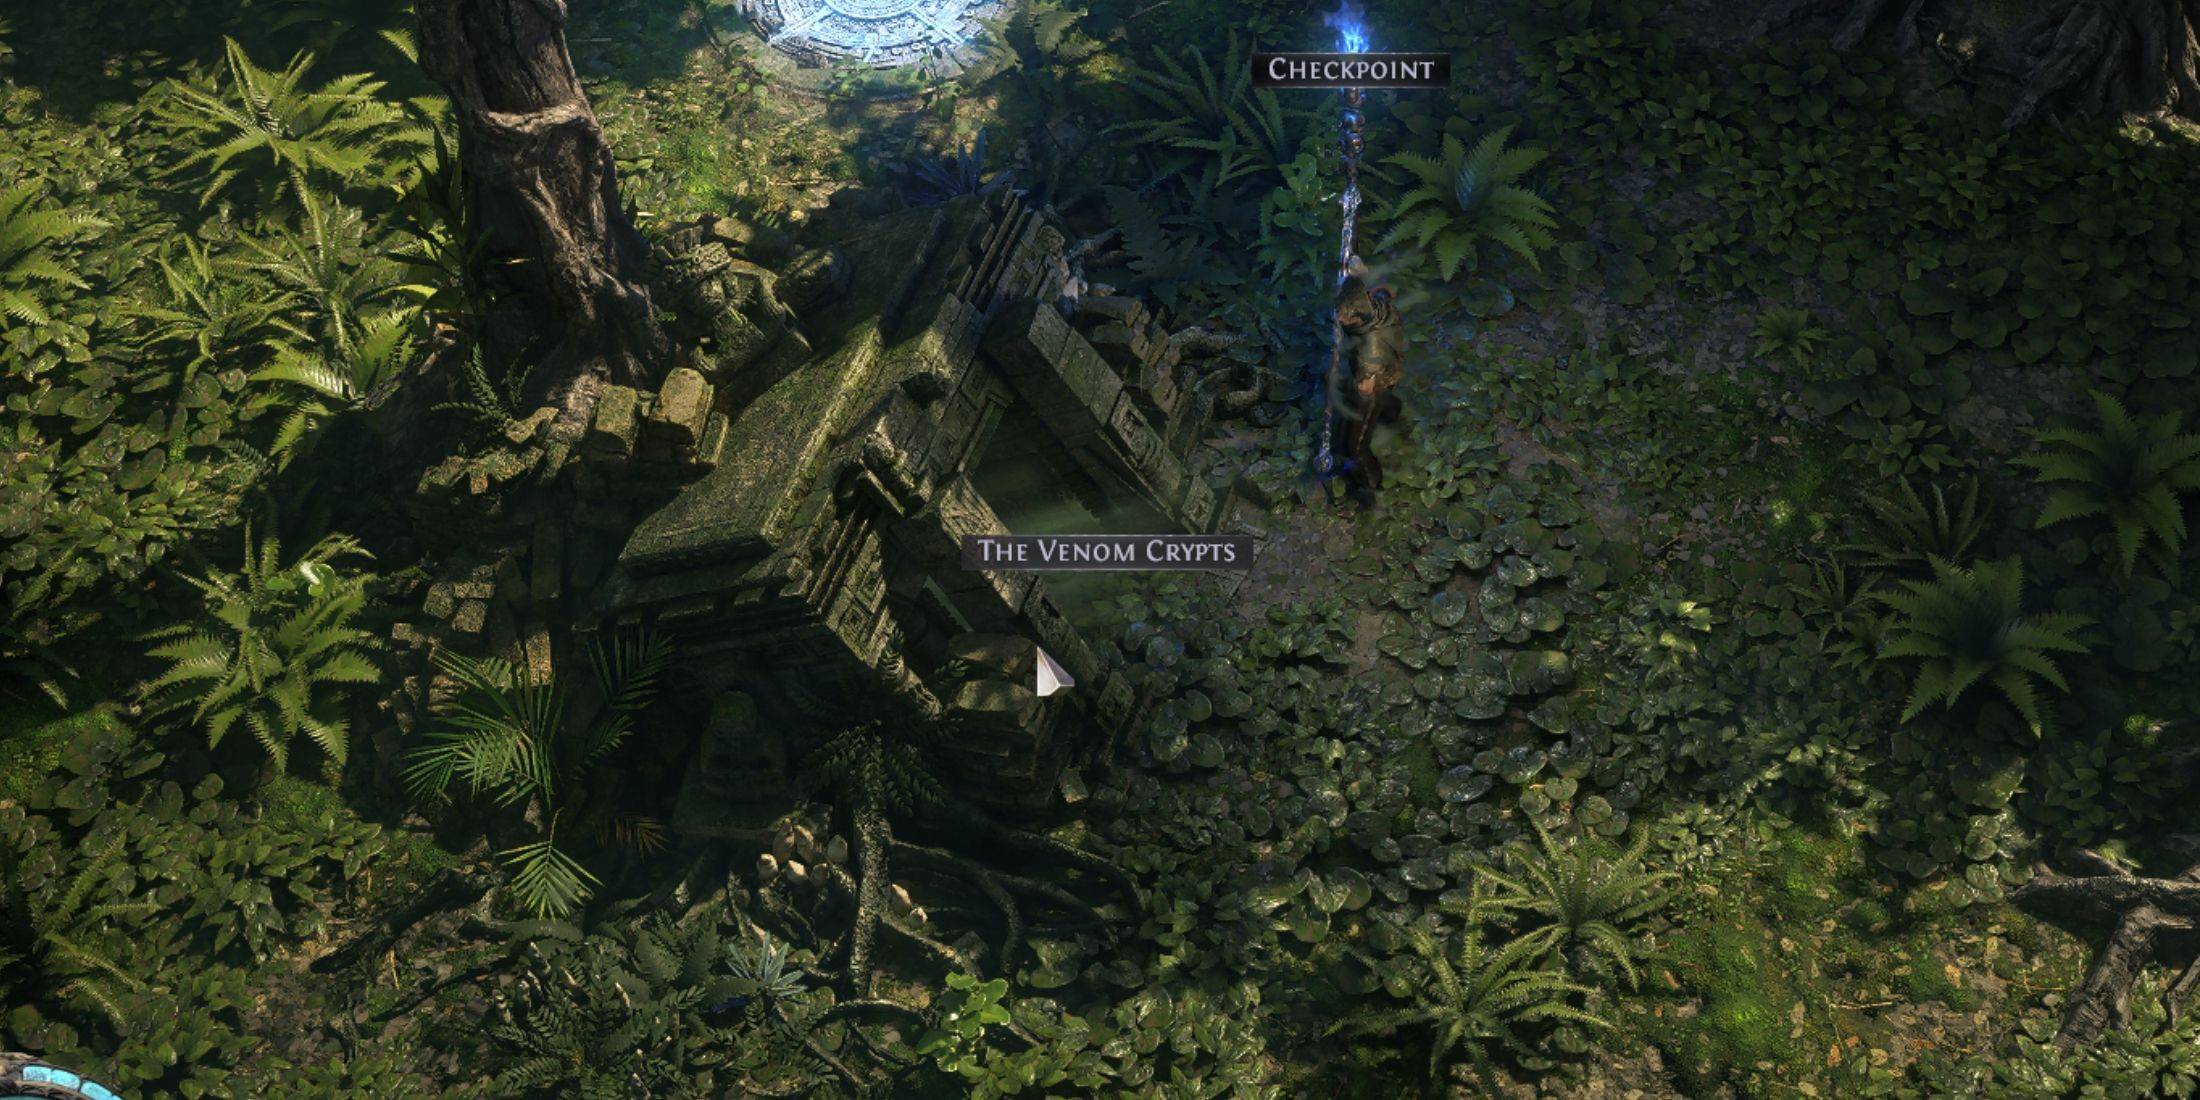 To begin The Slithering Dead, navigate to the Jungle Ruins map in Act 3 (and Act 3 Cruel) and locate the entrance to the Venom Crypts, which is conveniently positioned near the Jungle Ruins Waypoint.
The Jungle Ruins map features two exits: the Venom Crypts and the Infested Barrens. The latter advances the main questline, Legacy of the Vaal, while the Venom Crypts can be easily overlooked as they are not essential for the main storyline. If you miss the Venom Crypts during your initial playthrough, you can revisit them even after entering the endgame.
Once inside the Venom Crypts, explore the area thoroughly until you encounter a Corpse in the Den of the Serpent Priestess. The precise location of this spot varies as all maps in PoE 2 are randomly generated, but it's typically situated far from the entrance.
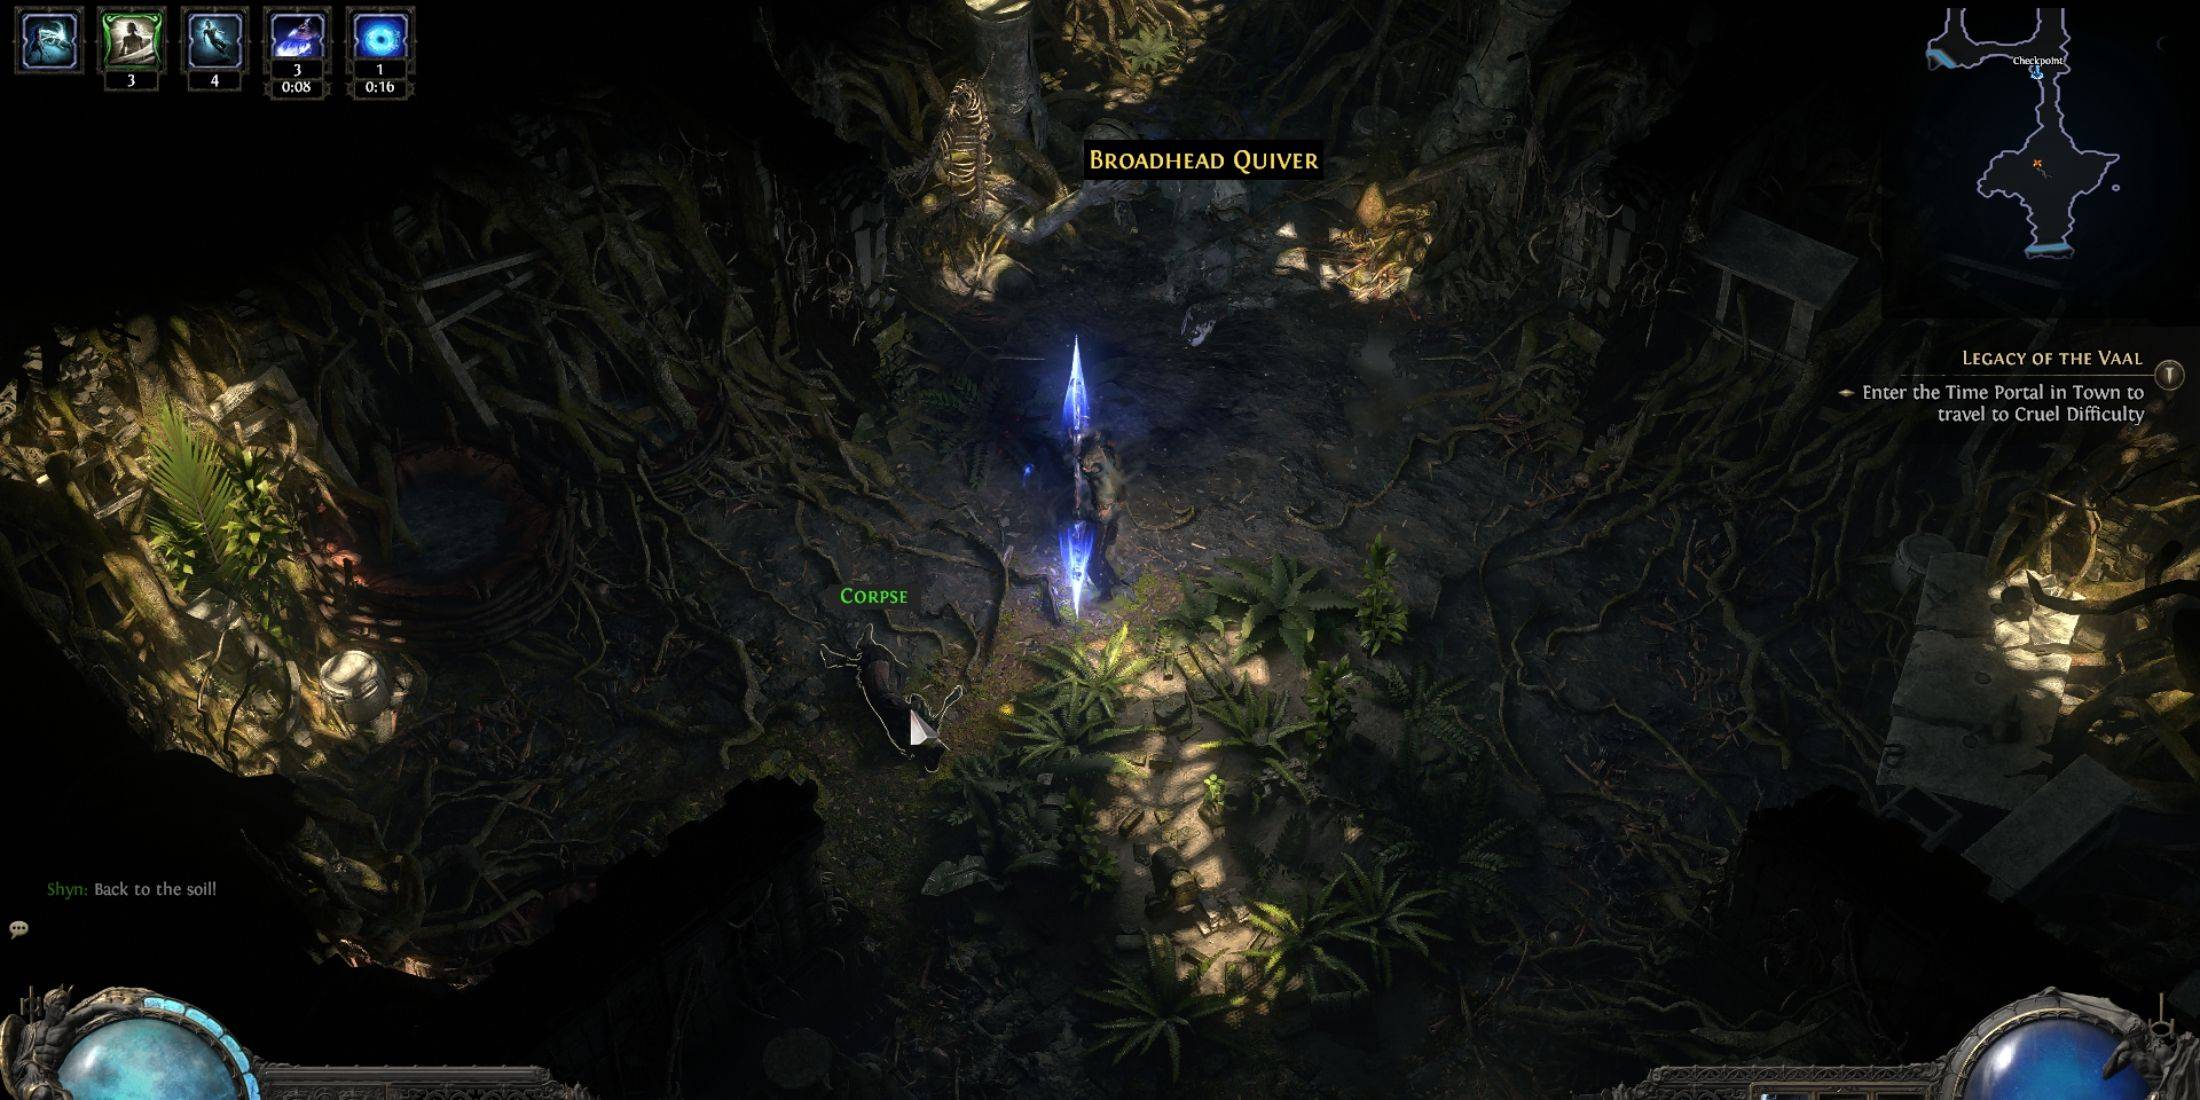 Interact with the Corpse, prompting your character to automatically collect the Corpse-Snake Venom. Return to the Ziggurat Encampment and deliver the Venom to Servi, completing The Slithering Dead.
 As a repeatable quest, The Slithering Dead appears in both Act 3 and Act 3 Cruel, offering different rewards each time. Here's a breakdown of the options:
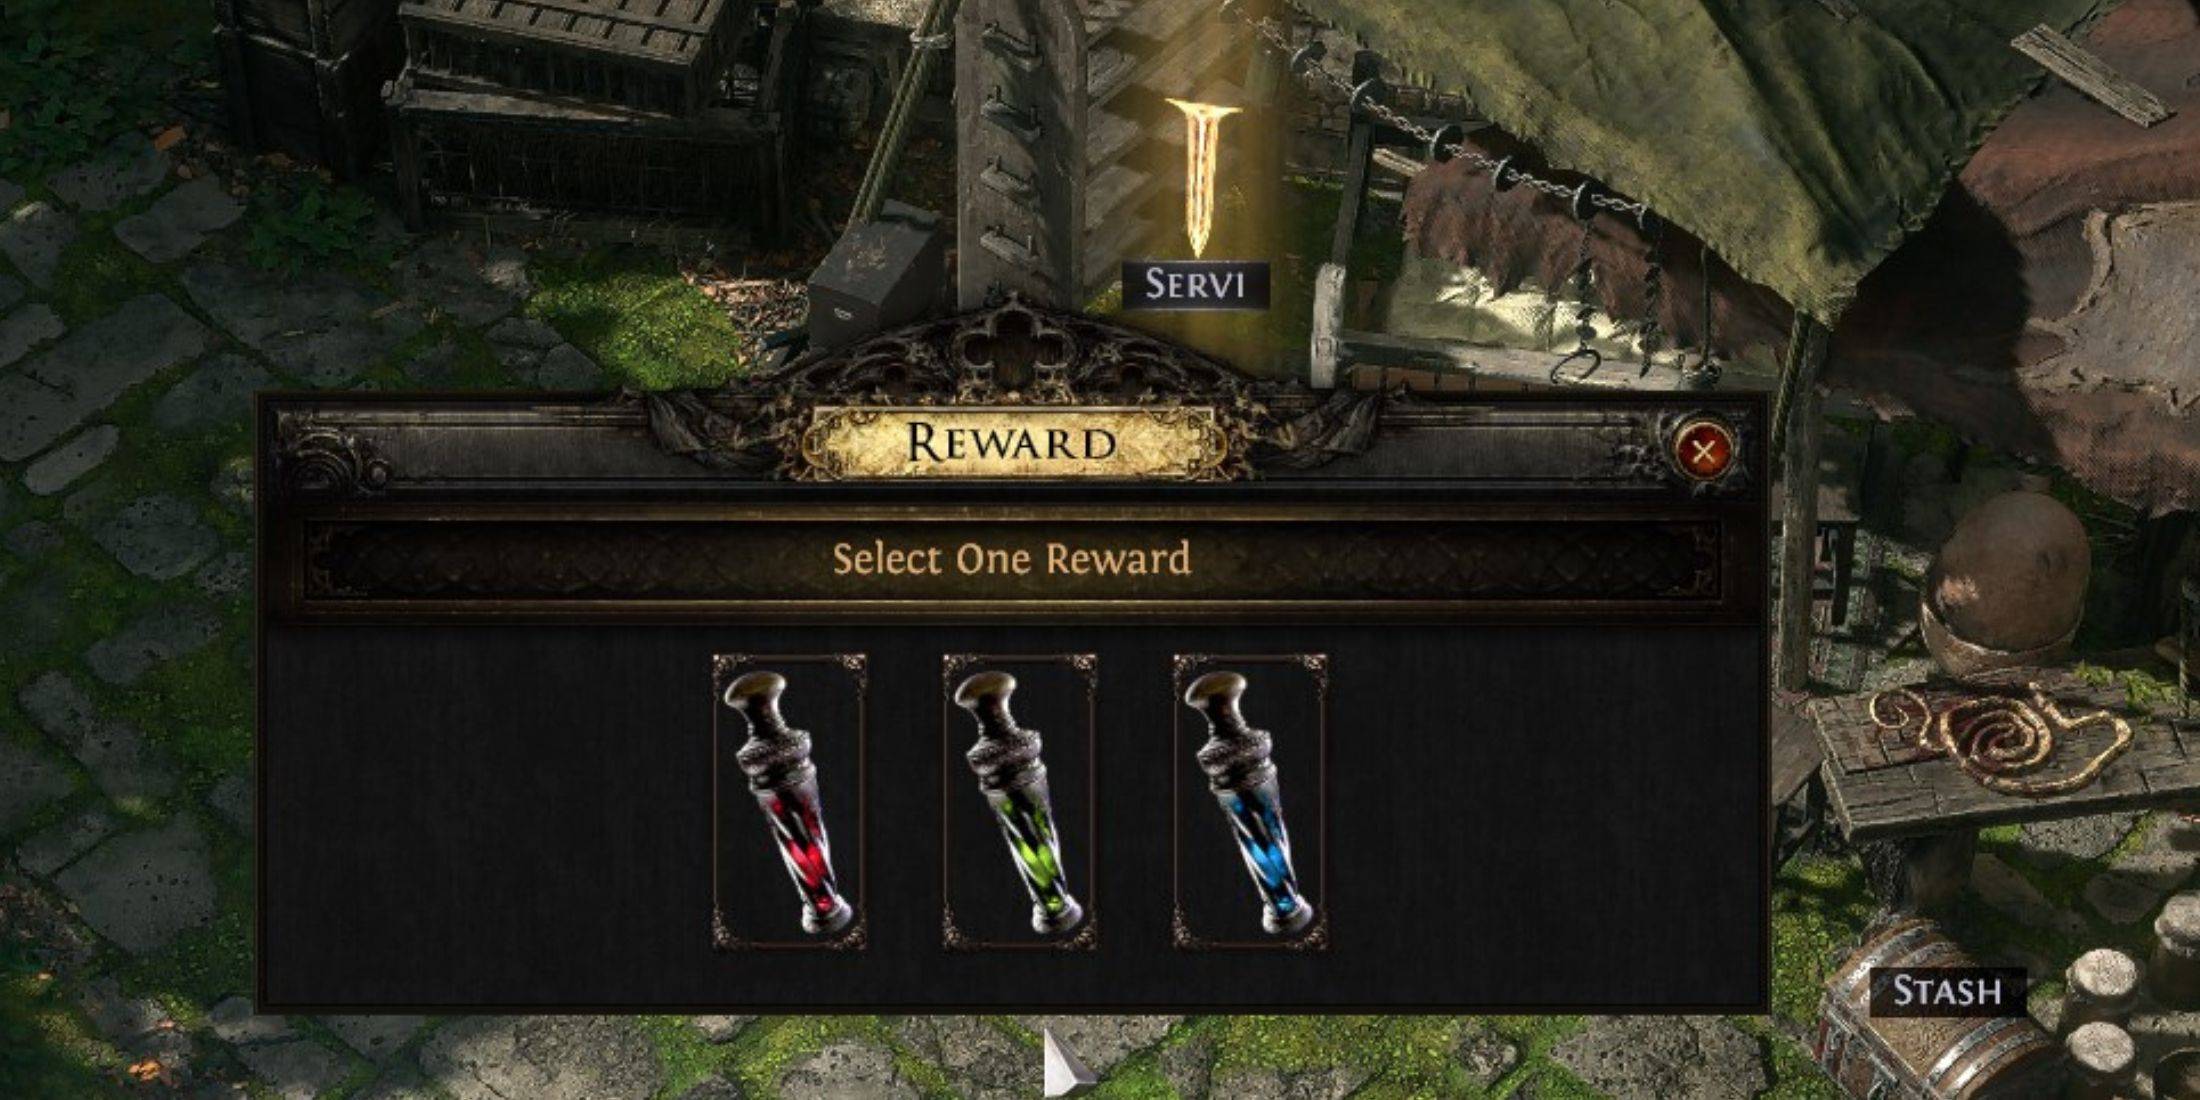
After some dialogue, Servi presents you with three quest rewards. Your choice is final, so consider it carefully. The available rewards are:
Once you've made your selection, it's permanent. The Venom Draught of Clarity (25% increased Mana Regen Rate) is generally the most beneficial choice, particularly for melee classes like Monks and Warriors who often struggle with mana regeneration during critical moments.
The Venom Draught of the Veil (30% increased Elemental Ailment Threshold) ranks as the second-best option, ideal for classes such as Witch and Sorceress who don't usually face mana issues. This reward increases resistance to elemental ailments like Bleed, Poison, Chill, Freeze, Ignite, Electrocute, or Shock from enemy attacks.
The Venom Draught of Stone, offering increased Stun Threshold, is the least appealing due to the relatively low frequency of Stun compared to other status ailments. However, some Warrior builds might find it useful if they frequently encounter Stun issues.
Similarly, in Act 3 Cruel, you'll face another set of Venom Draught choices:
Here, the Venom Draught of the Lost (+10% to Chaos Resistance) stands out as the best choice. Chaos Resistance is harder to accumulate compared to elemental resistances, making this reward highly valuable for most builds.
The only exception would be builds utilizing the Chaos Inoculation (CI) Node in the Passive Tree, which grants immunity to Chaos damage at the cost of reducing HP to 1. For these builds, the Venom Draught of the Sky (+5 to All Attributes) becomes a more suitable choice, especially when paired with Eternal Youth to convert Life Flasks to Energy Shield.
How to Feed Villagers in Necesse
Bitlife: How to Complete the Renaissance Challenge
Bahiti Hero Guide: Mastering the Epic Marksman in Whiteout Survival
Best Bullseye Decks in Marvel Snap
One of the most famous CoD players thinks the series is in the worst state now
How to Complete Canker in Kingdom Come Deliverance 2
Infinity Nikki: How to win at Marble King
How to Start Cars Without Keys in Project Zomboid

Persona 4 Remake Rumors: Will Persona 4 Reload Happen?
Apr 18,2025

Complete For Whom the Bell Tolls Guide in Kingdom Come Deliverance 2
Apr 18,2025

Hogwarts Mystery: Complete Romance Guide
Apr 18,2025

Google Expands Android Gaming to PC with Google Play Games
Apr 18,2025

Exclusive Preview: Heartfelt Coming-of-Age Graphic Novel
Apr 18,2025
 Category